Integration with Customer.io
The EmailVerify.io integration connects directly with your Customer.io workspace to help maintain clean, accurate, and deliverable email lists. It verifies subscriber emails in real time, flags invalid, disposable, or catch-all addresses, and updates your Customer.io data automatically.
This integration ensures your messages reach active email addresses, reduces bounce rates, and protects your sender reputation, all without changing your existing segments or workflows.
Prerequisites
Before beginning, make sure you have:
- An active Customer.io account
- An EmailVerify.io account
- Access to your Customer.io workspace and Admin API credentials
EmailVerify.io uses secure API authentication. Your login details remain private and are never stored.
Step-by-Step Integration Setup
Follow these steps to connect Customer.io with EmailVerify.io and start verifying your subscribers.
Step 1: Sign in to EmailVerify.io
Go to https://app.emailverify.io/users/sign_in and log in to your EmailVerify.io account. After signing in, navigate to the Integrations section and search for Customer.io.
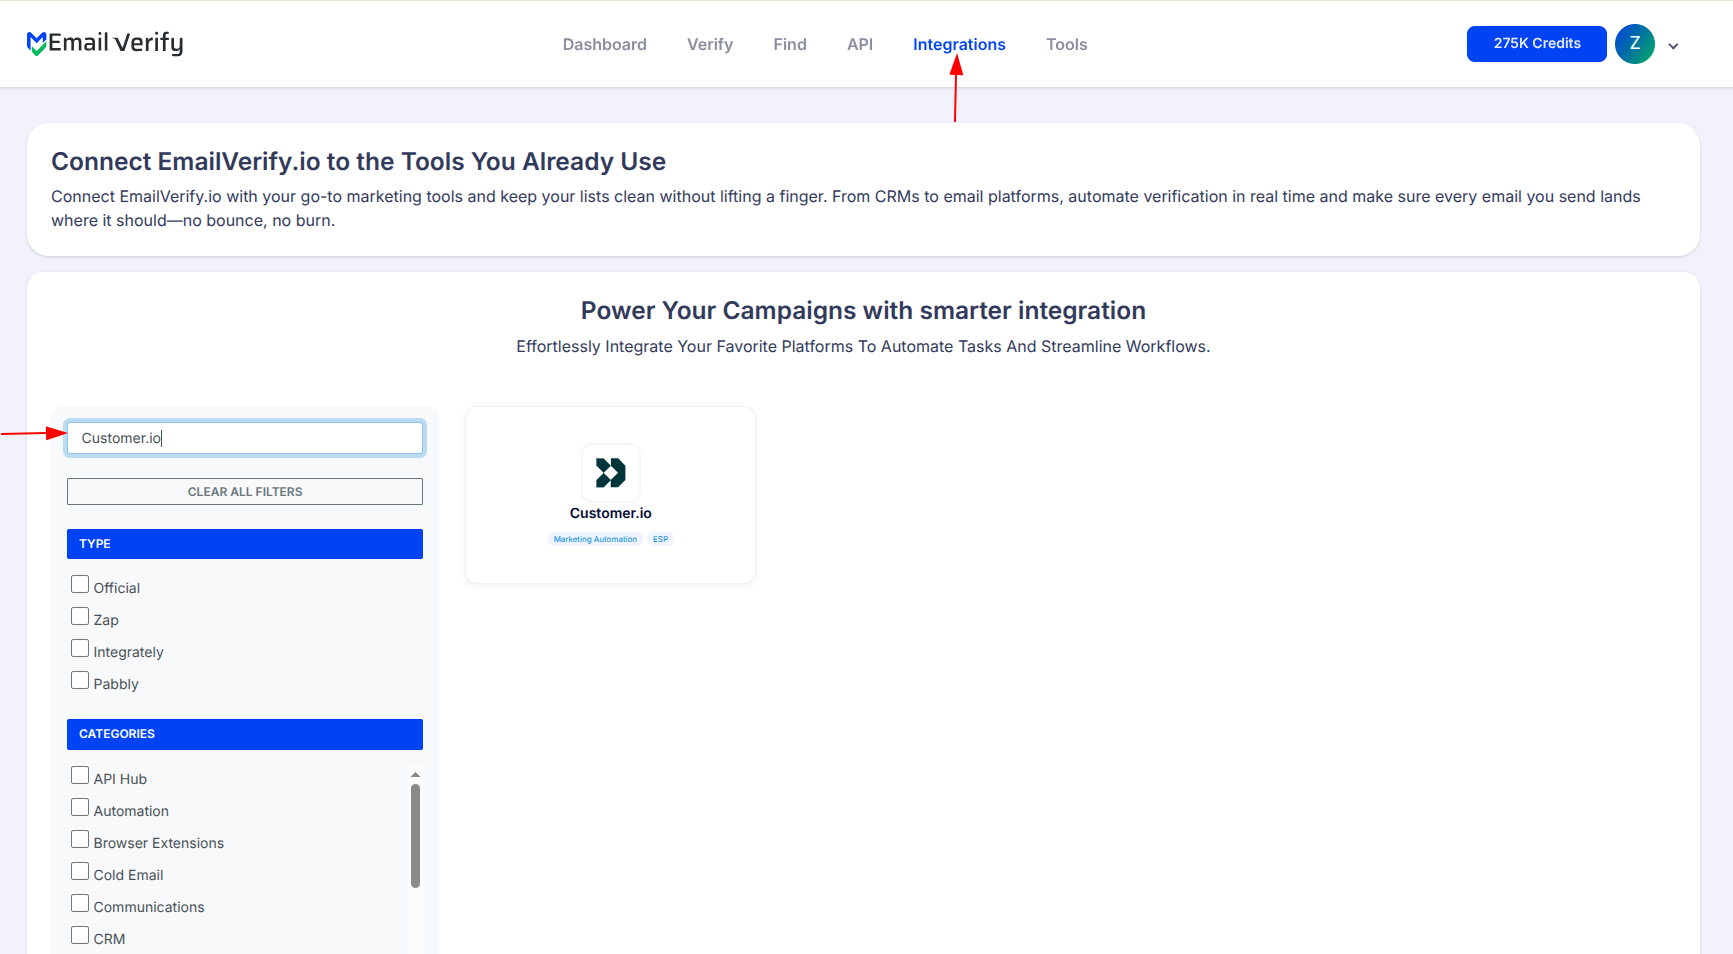
Step 2: Select Customer.io
On the Integrations page, select Customer.io from the list of available integrations. You will be prompted to enter the required credentials to securely connect your account.
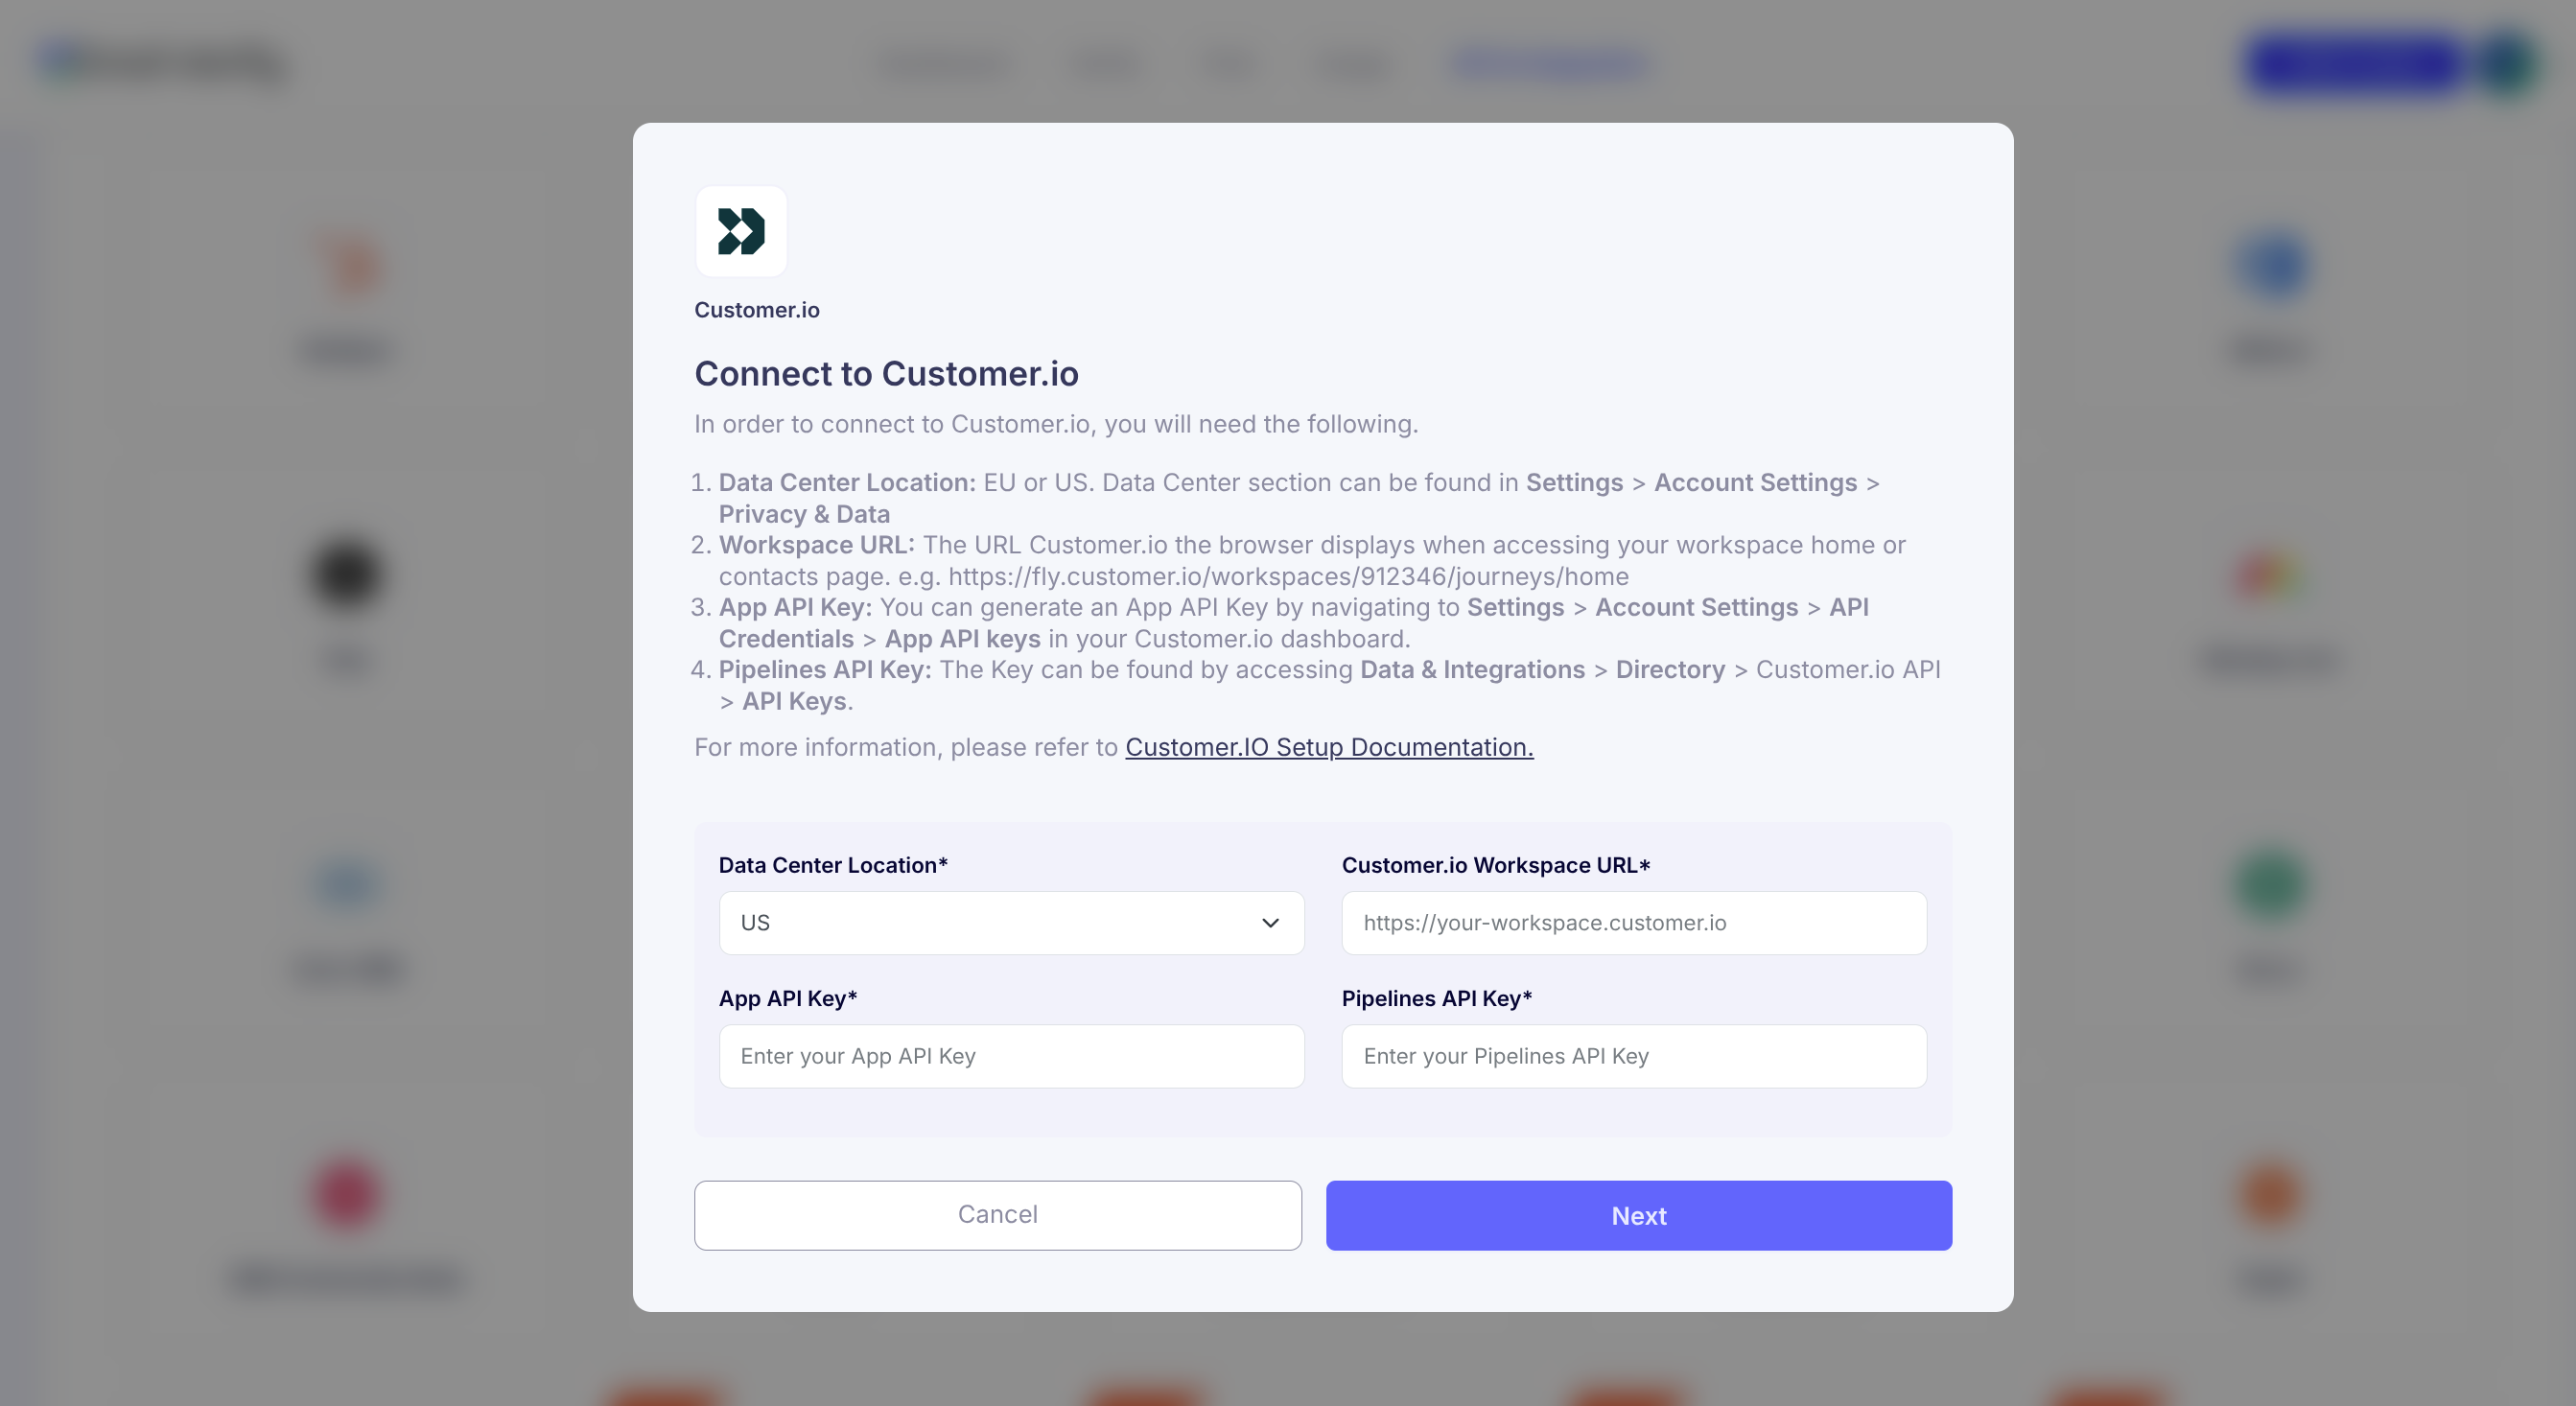
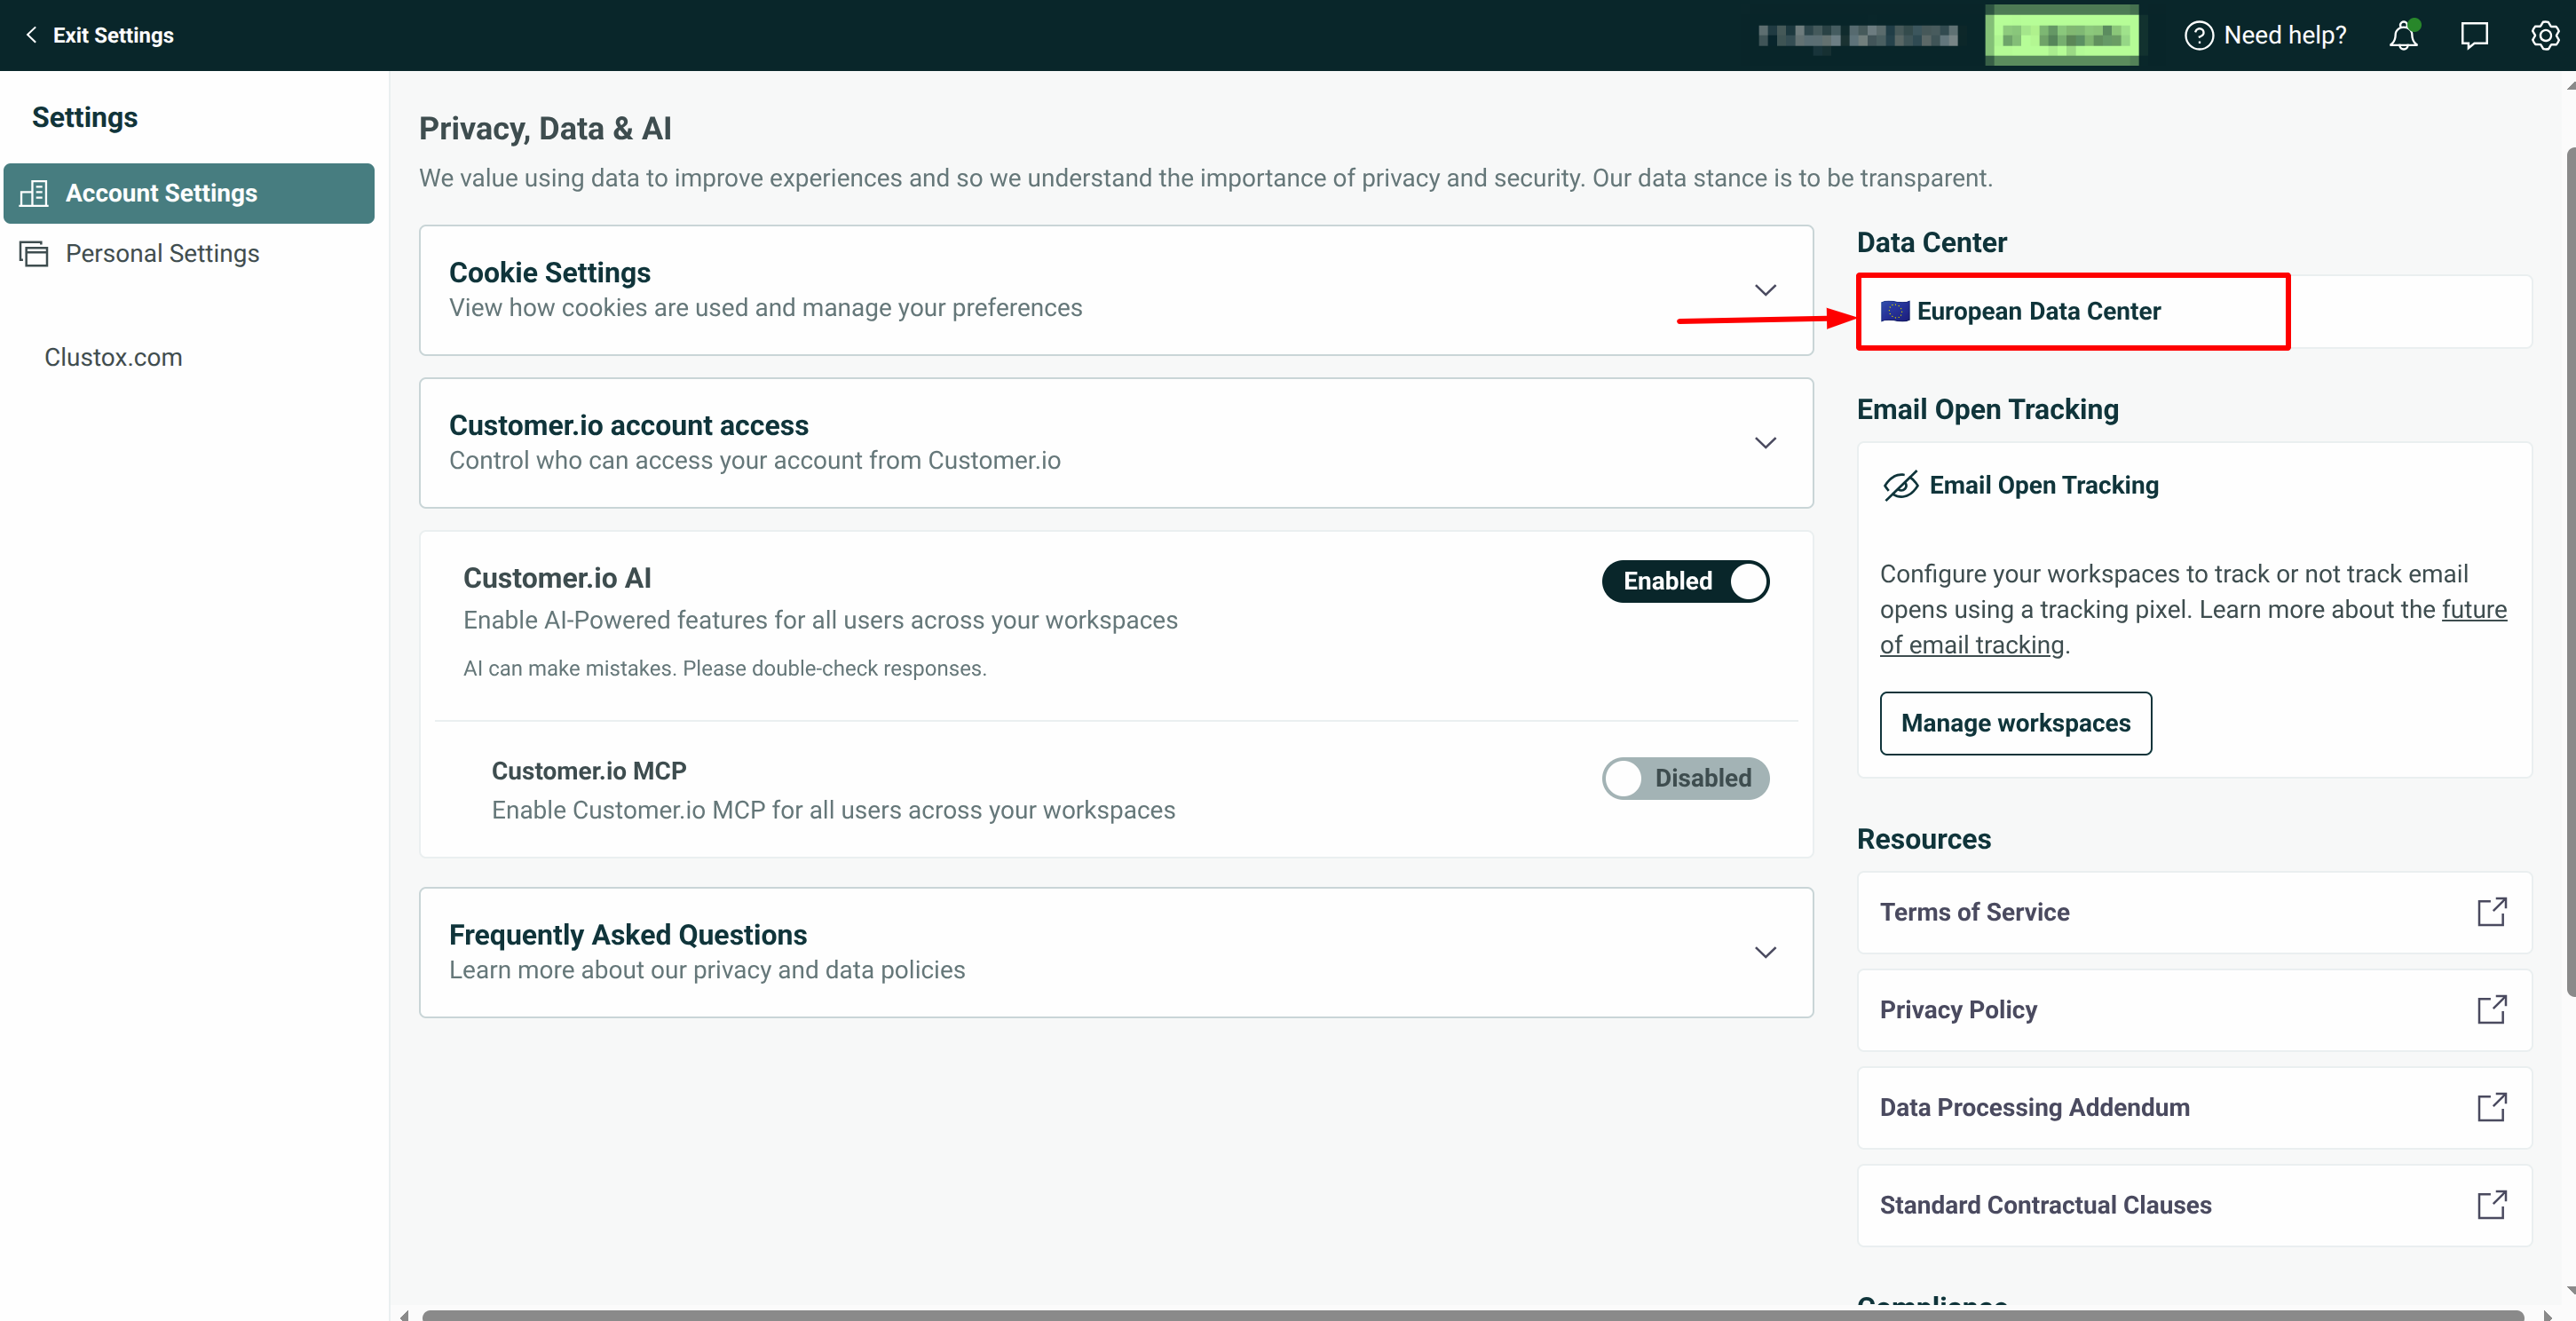
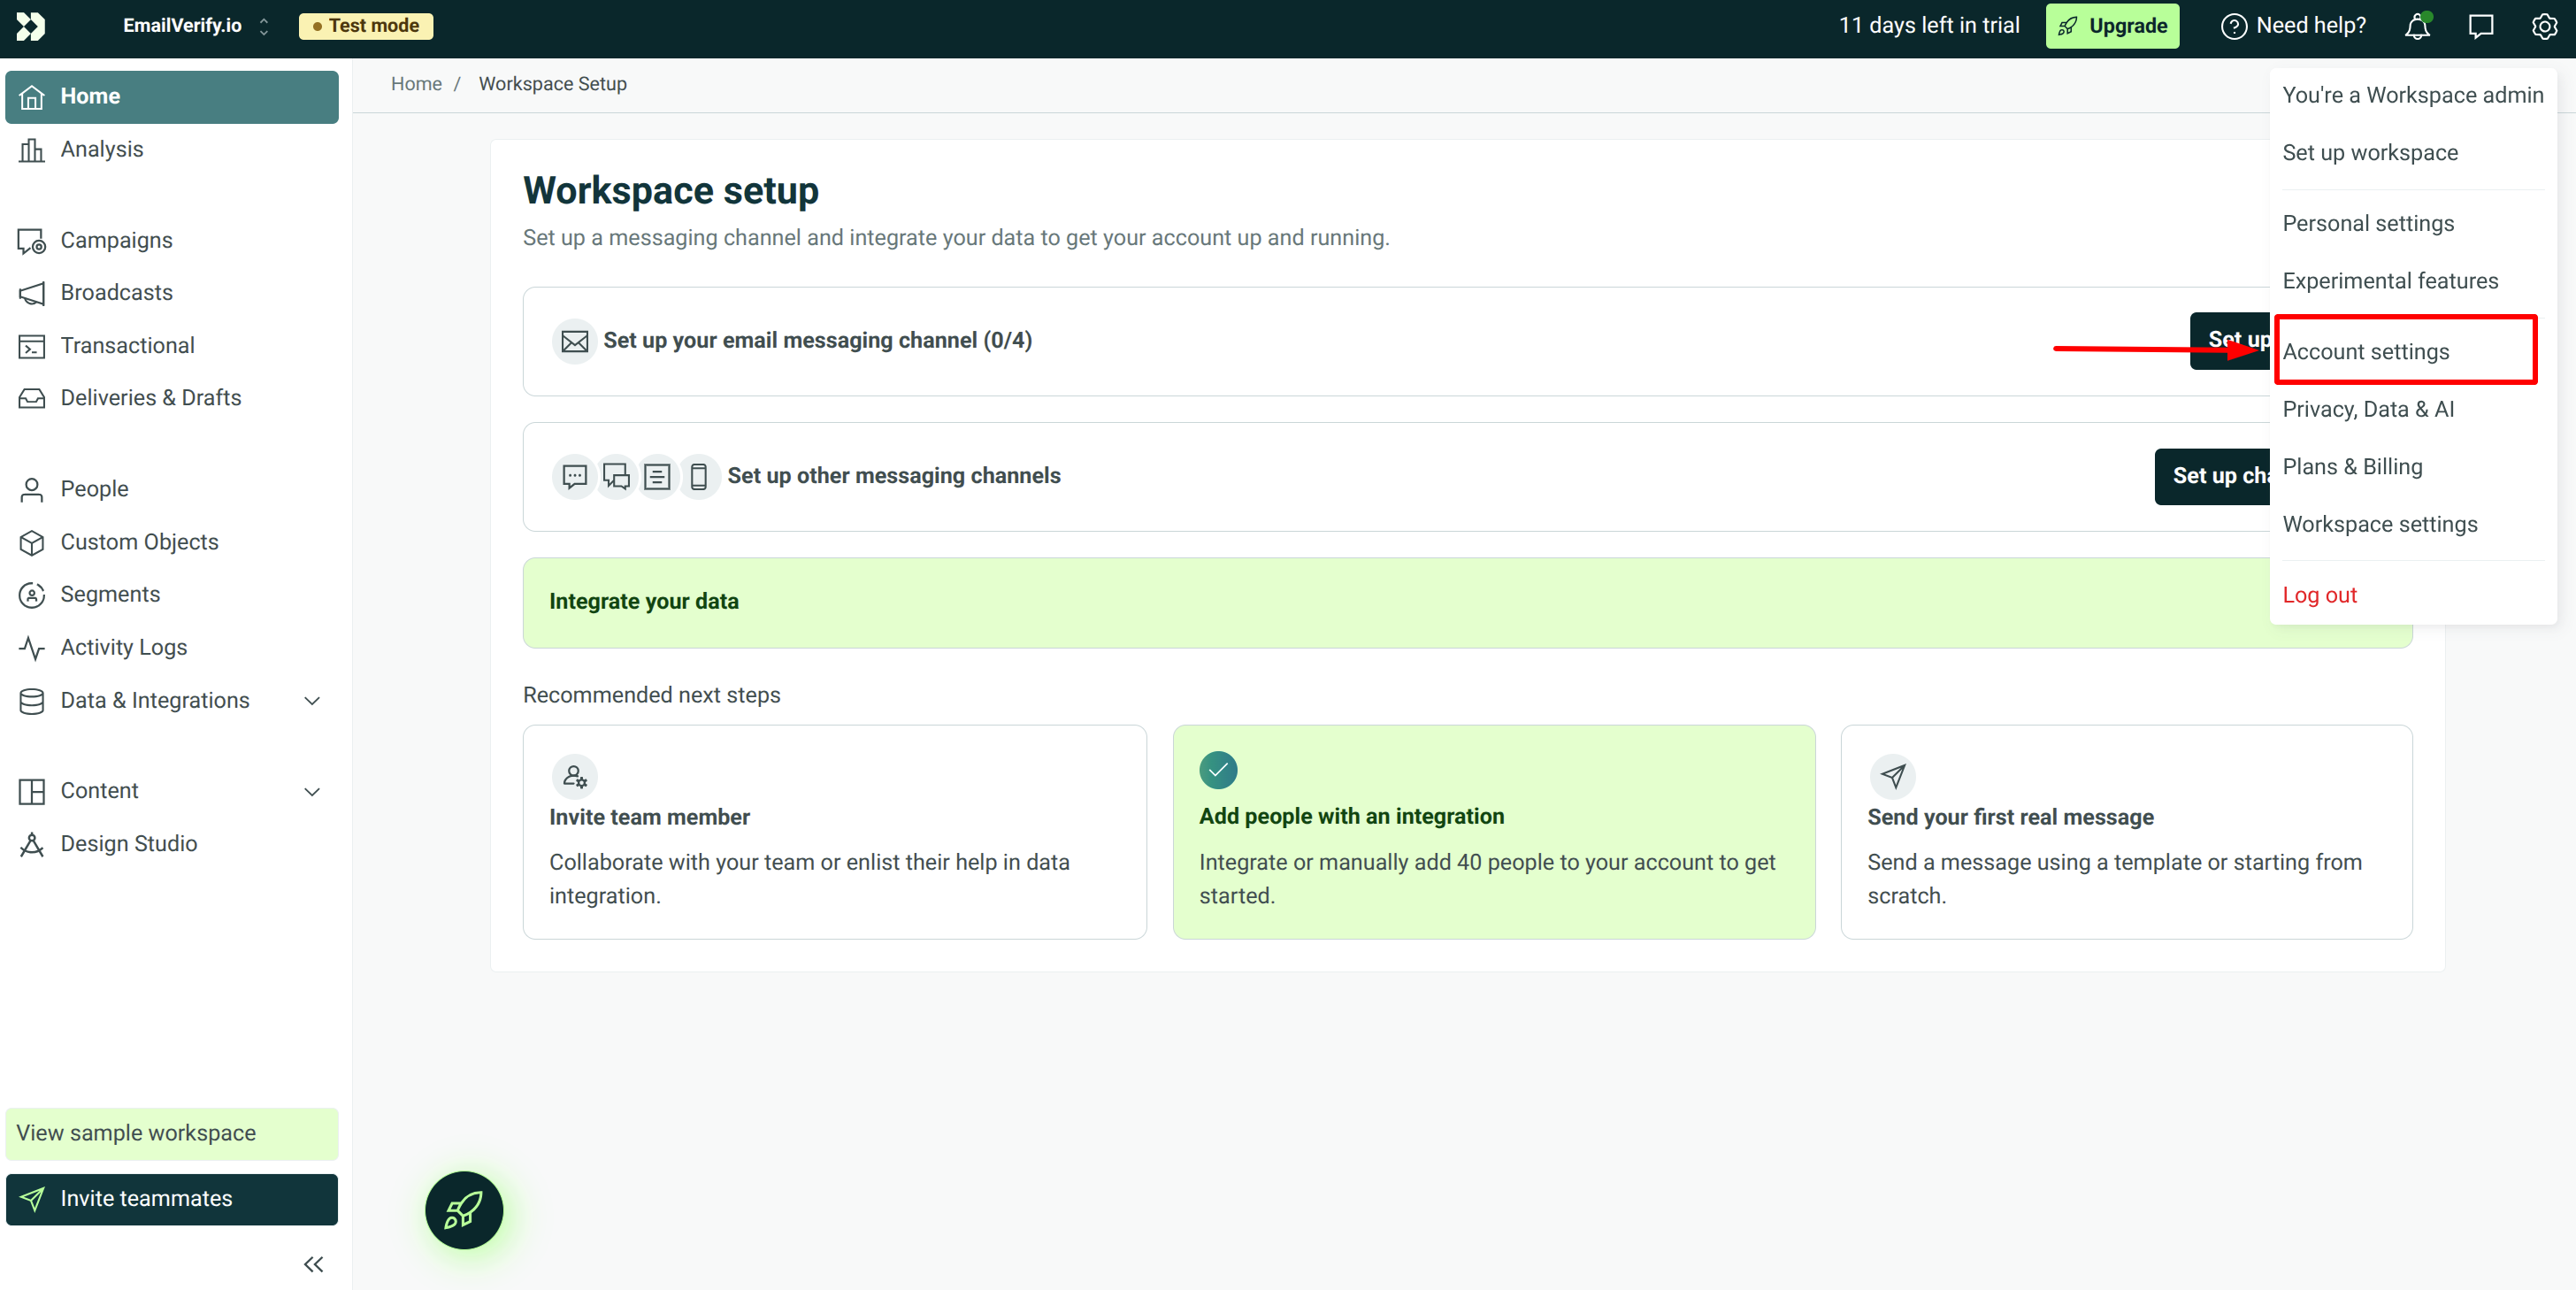
Step 3: Locate Your Data Center
In your Customer.io account, go to Settings > Account Settings > Privacy, data & AI. Locate the Data Center section, which indicates whether your workspace is hosted in the US or EU.
Step 4: Get Workspace URL
Open your Customer.io dashboard and go to your workspace home. Copy the workspace URL shown in your browser (for example: https://fly.customer.io/workspaces/912346). You’ll need this during the setup process.
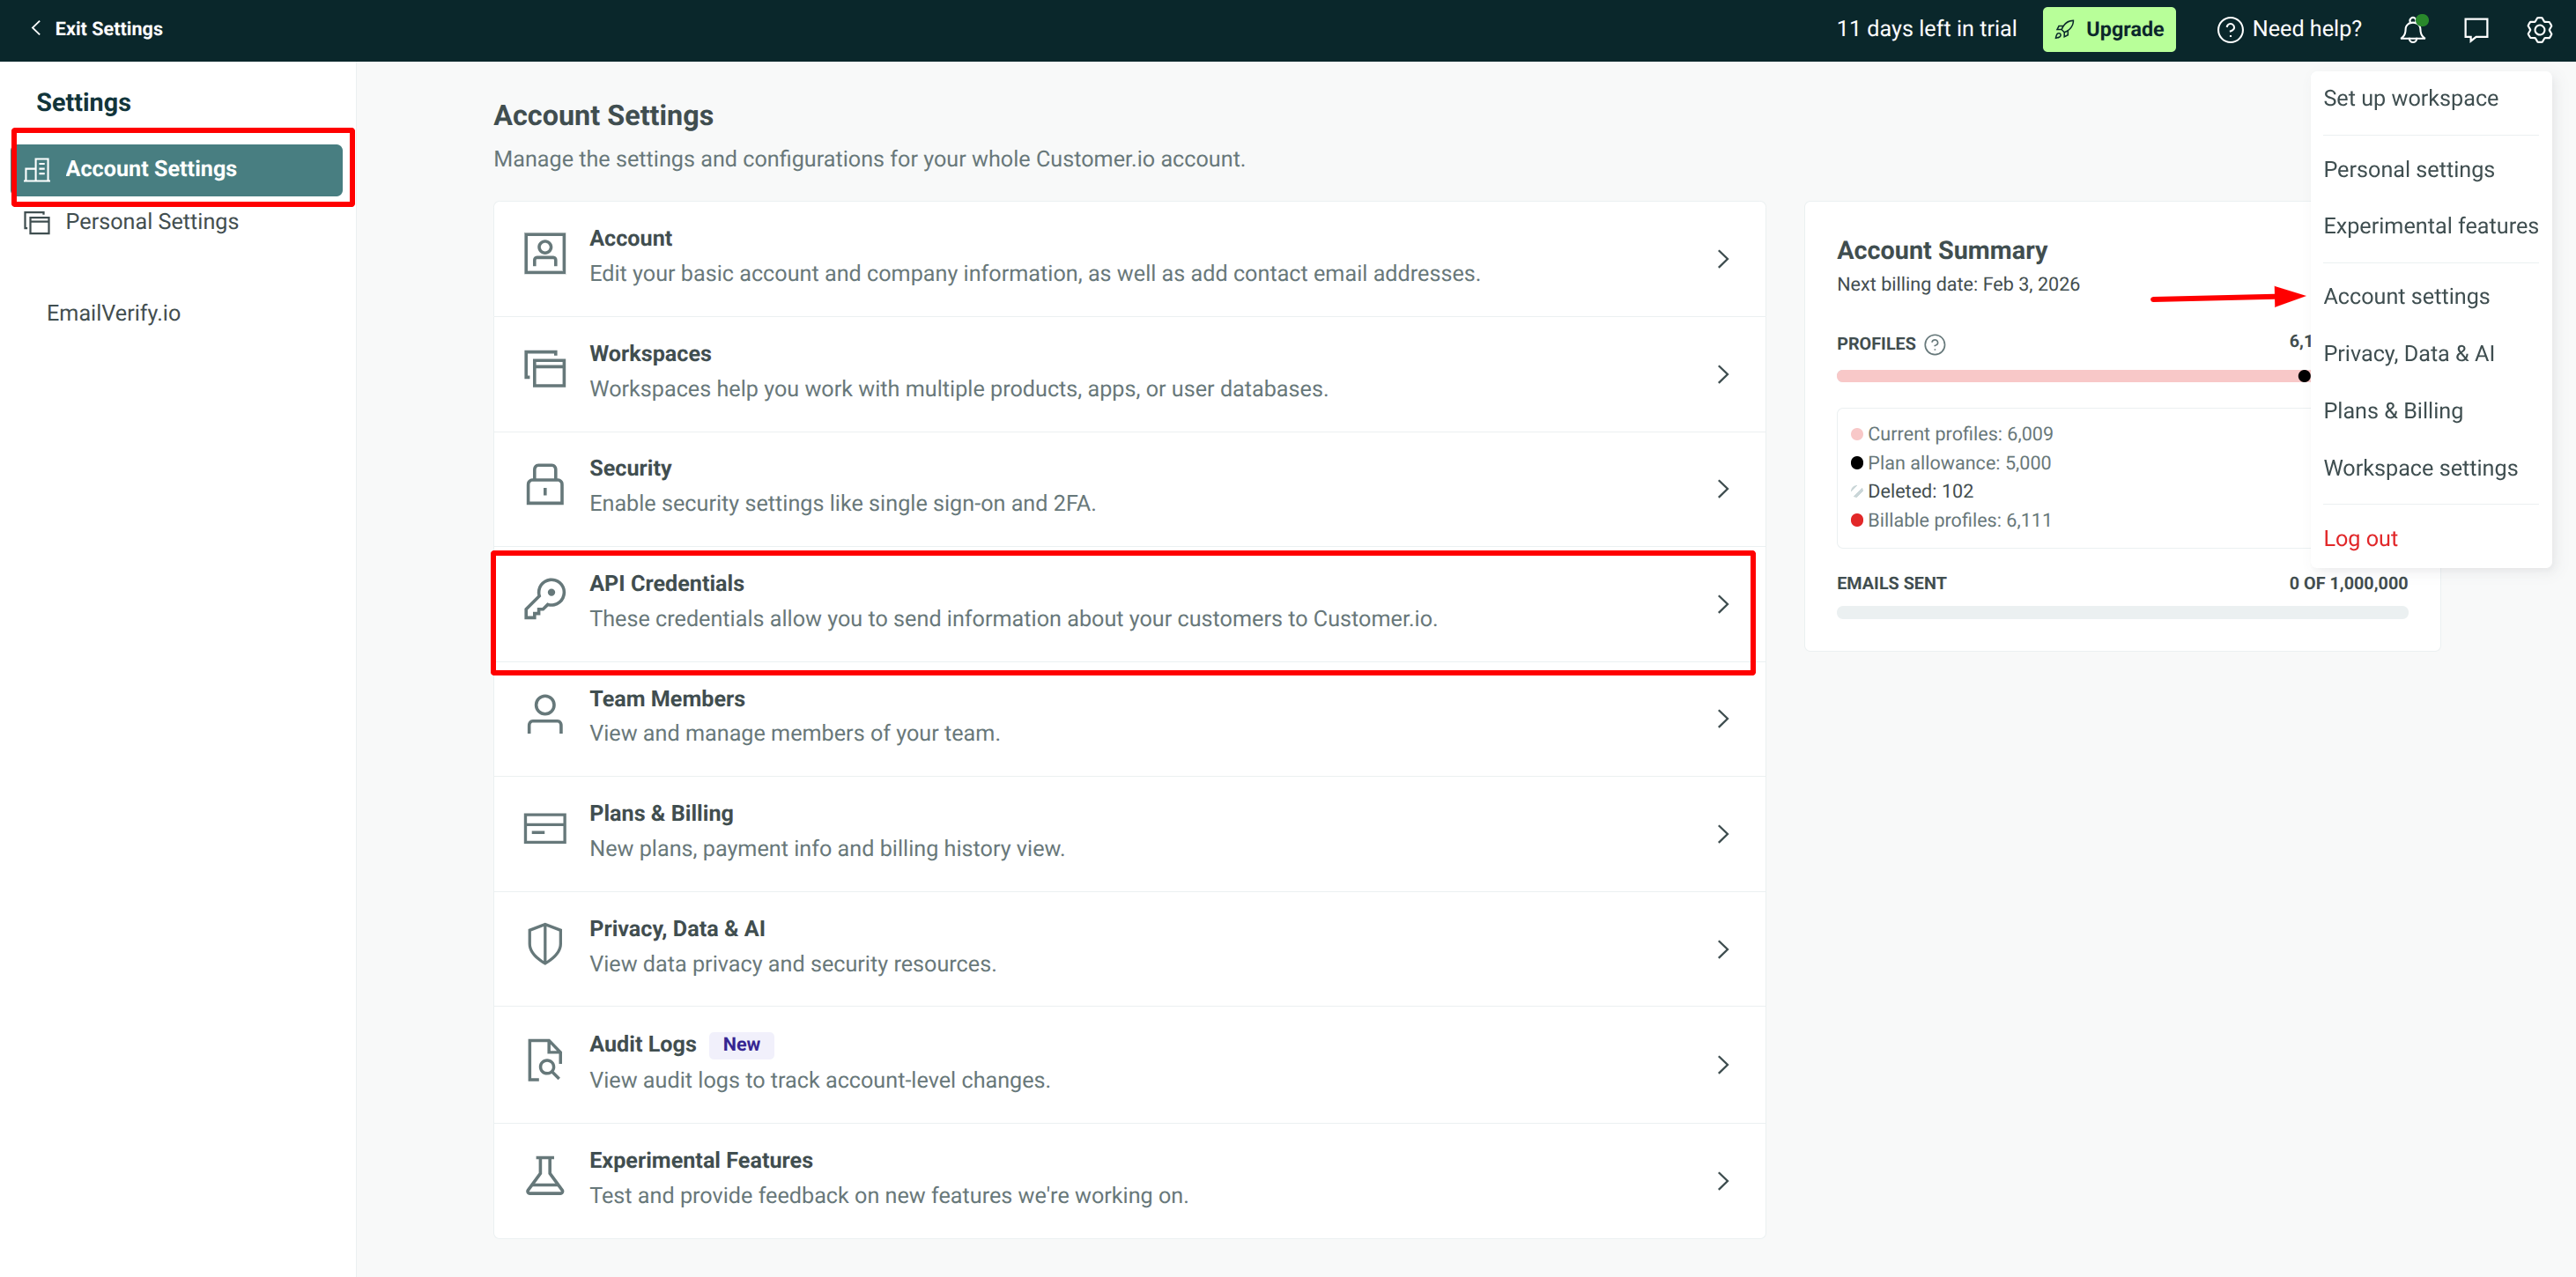
Step 5: Get APP API Key
In Customer.io, navigate to Account Settings > API Credentials to access your API key settings.
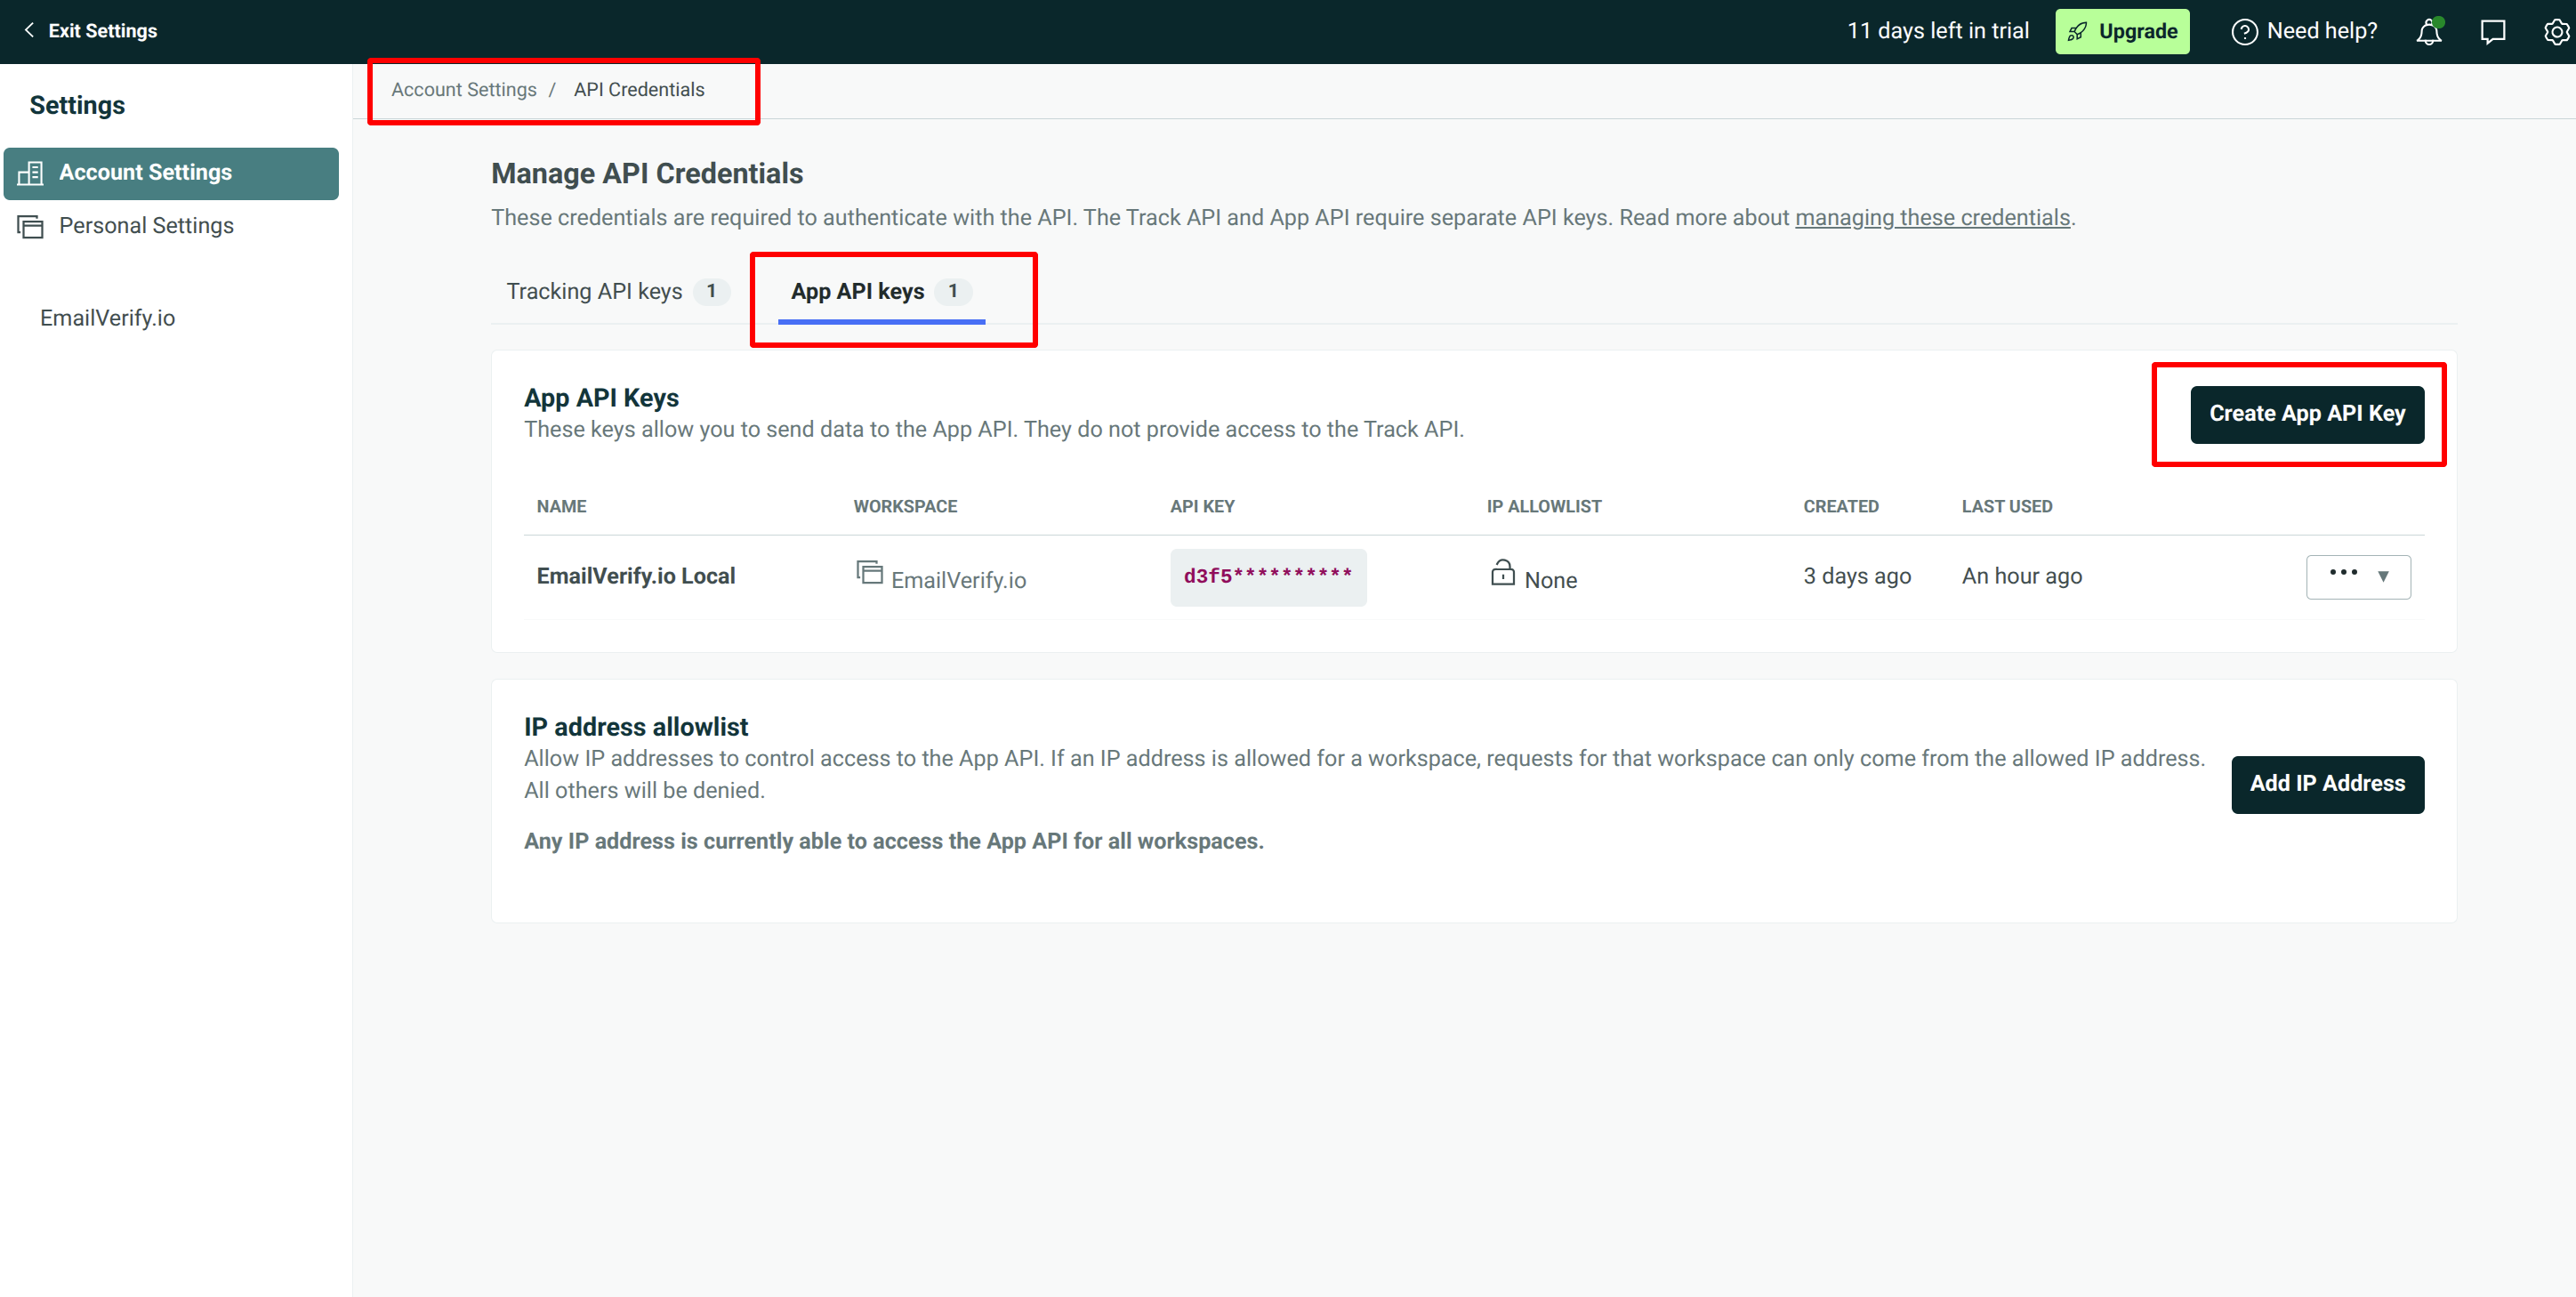
Step 6: Generate APP API Key
Within the App API Keys section, generate a new API key if required. This key will be used to authorize the connection with EmailVerify.io.
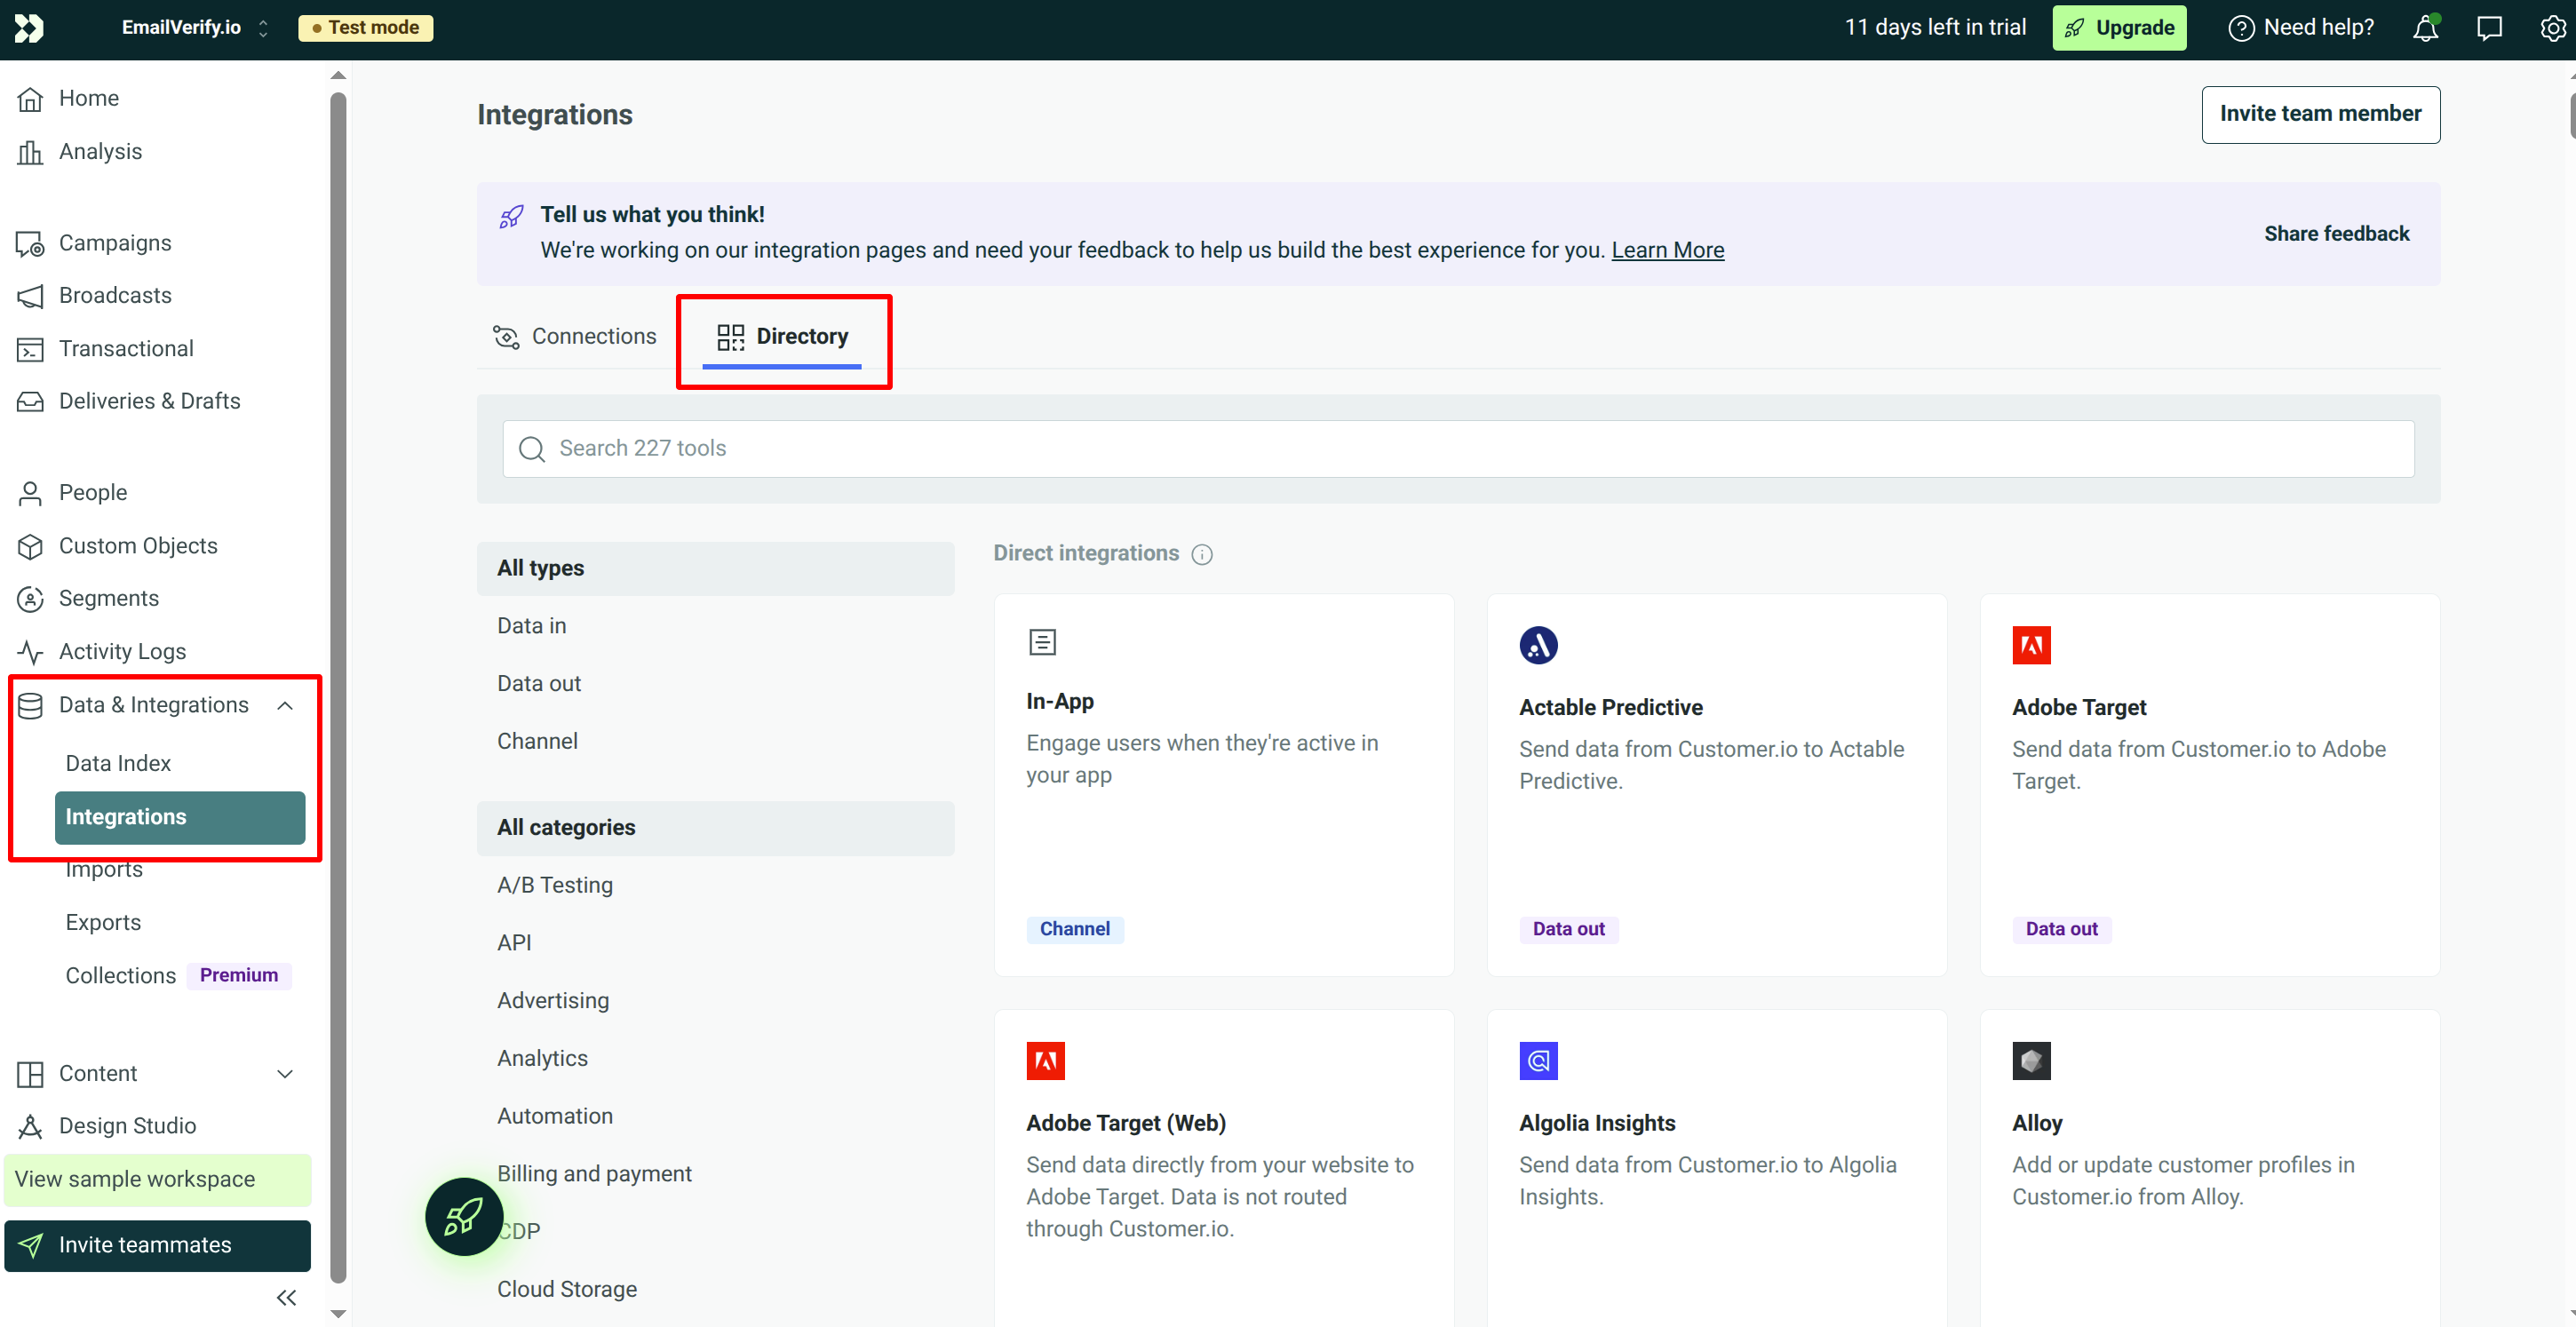
Step 7: Get Pipeline API Key
From the left-hand menu in Customer.io, go to Data & Integrations → Integrations, then open the Directory tab. This is where you can proceed with accessing the required Pipeline API setup.
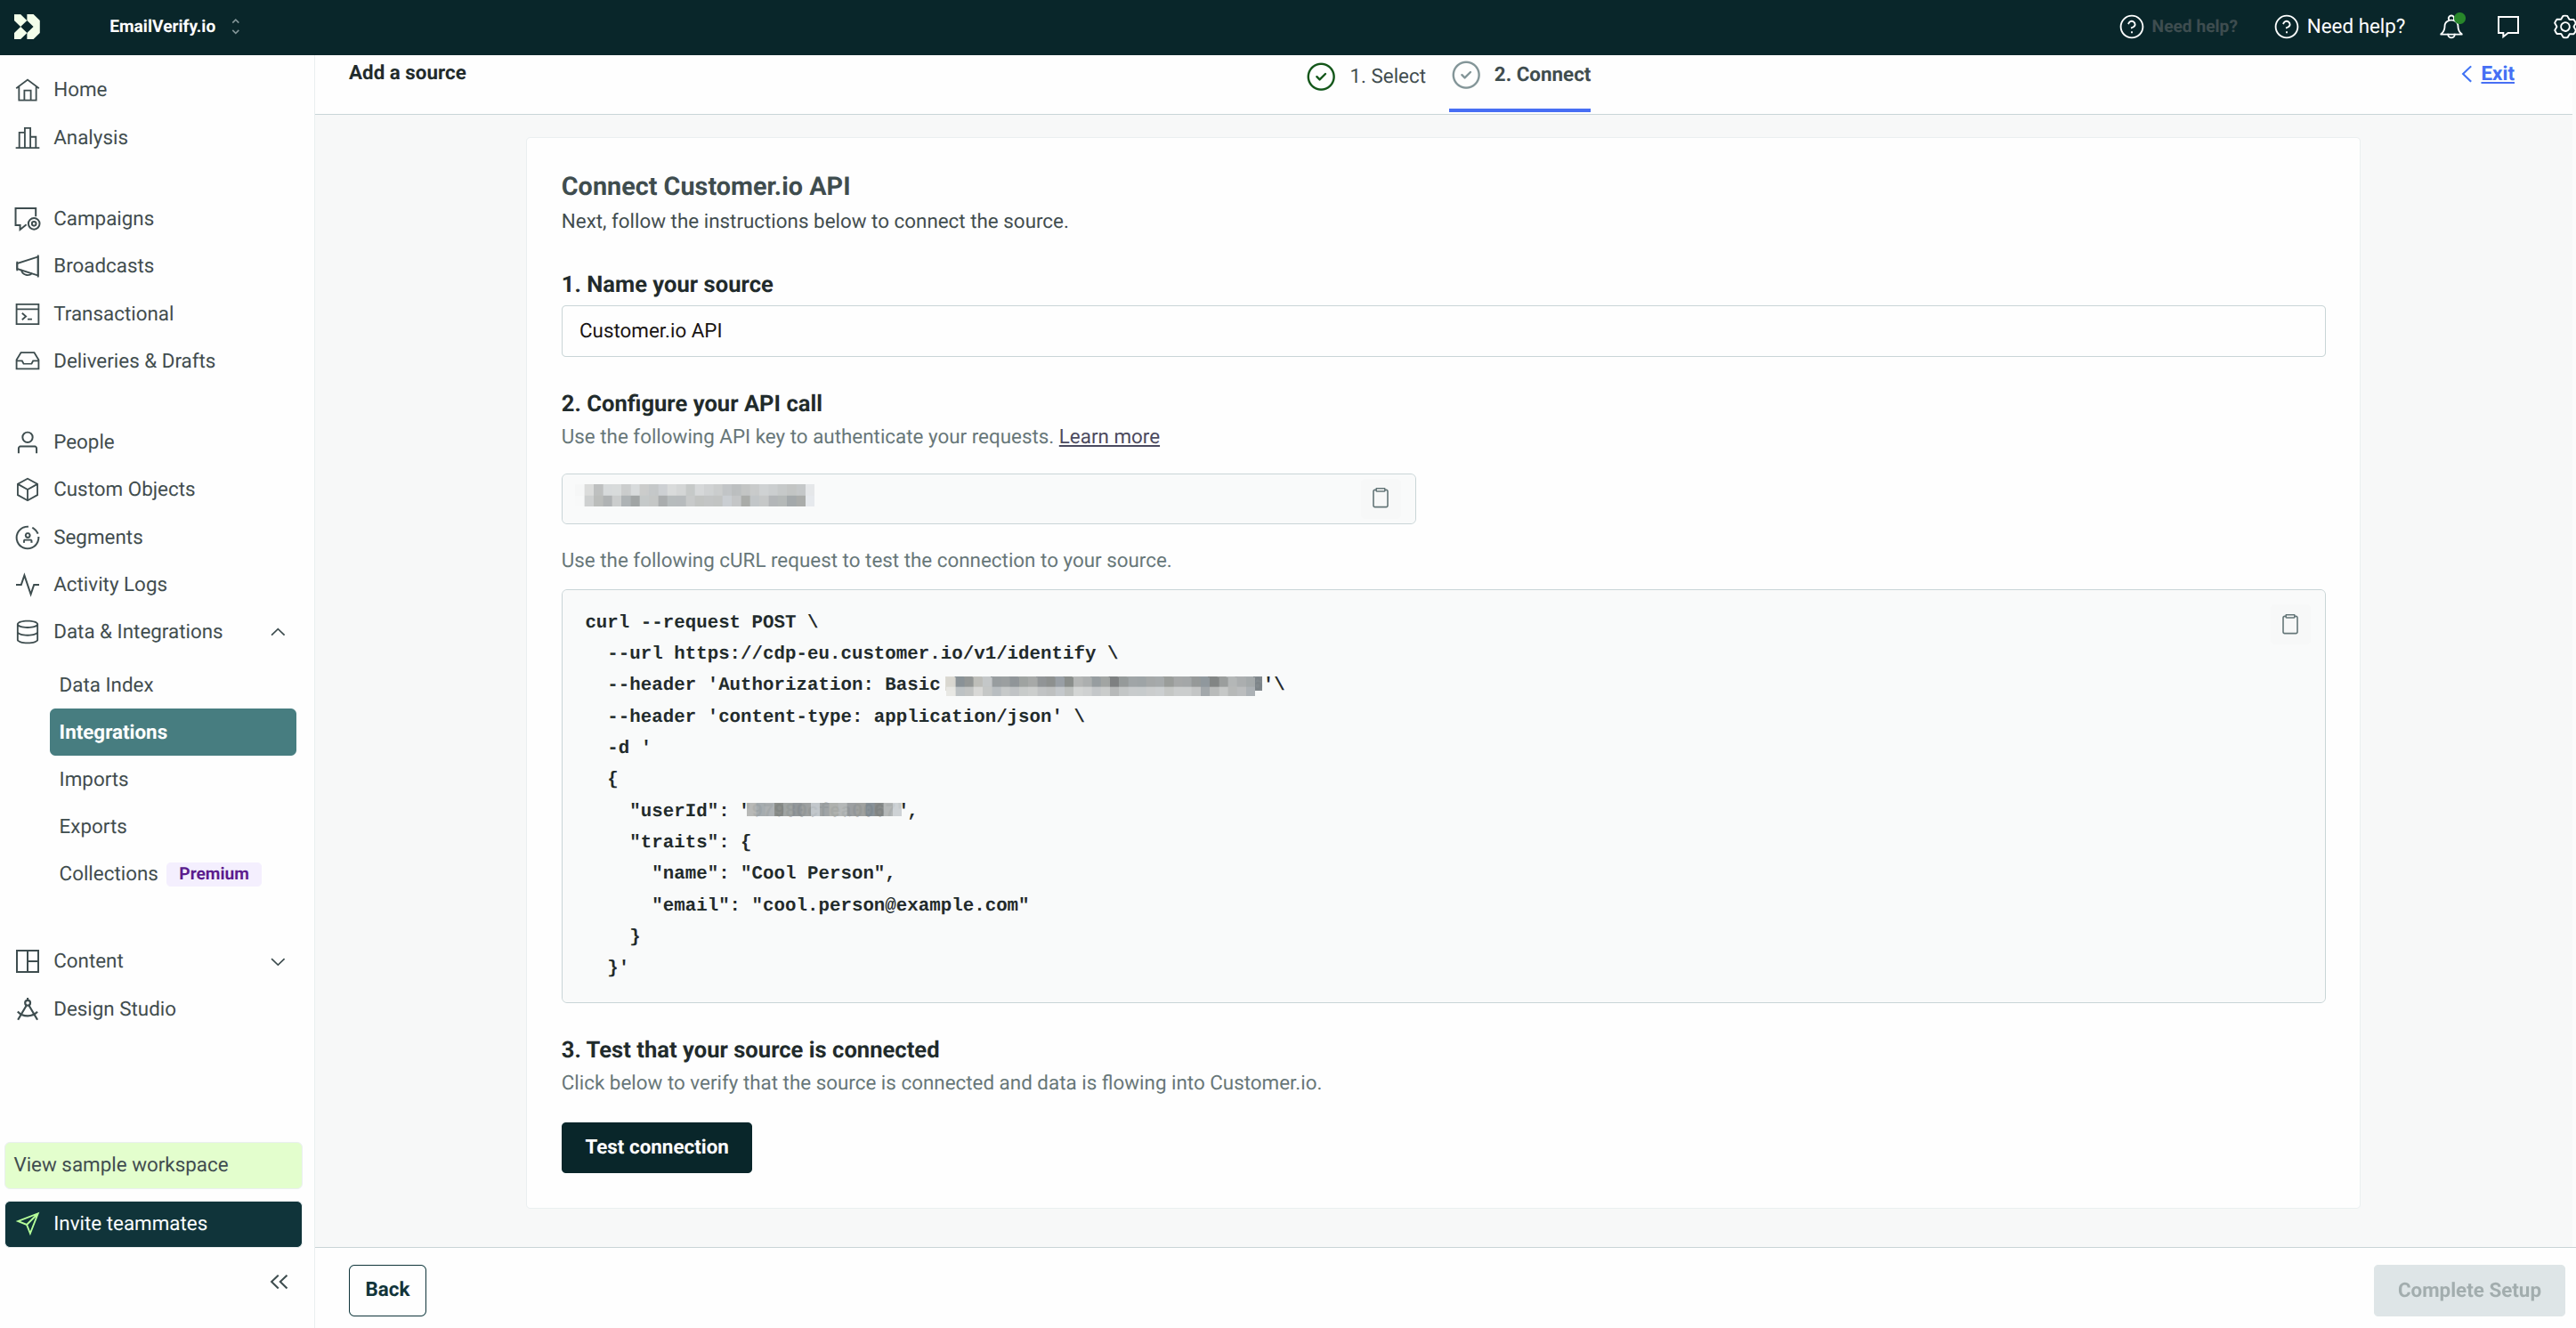
Step 8: Select Customer.io API
Search for Customer.io and choose the Customer.io API integration. During installation, you may be asked to execute a curl command as displayed in the dashboard. Once completed, enter the generated key into EmailVerify.io.
Step 9: View Your Lists
After successful authorization, your Customer.io lists will appear in the EmailVerify.io integrations page.
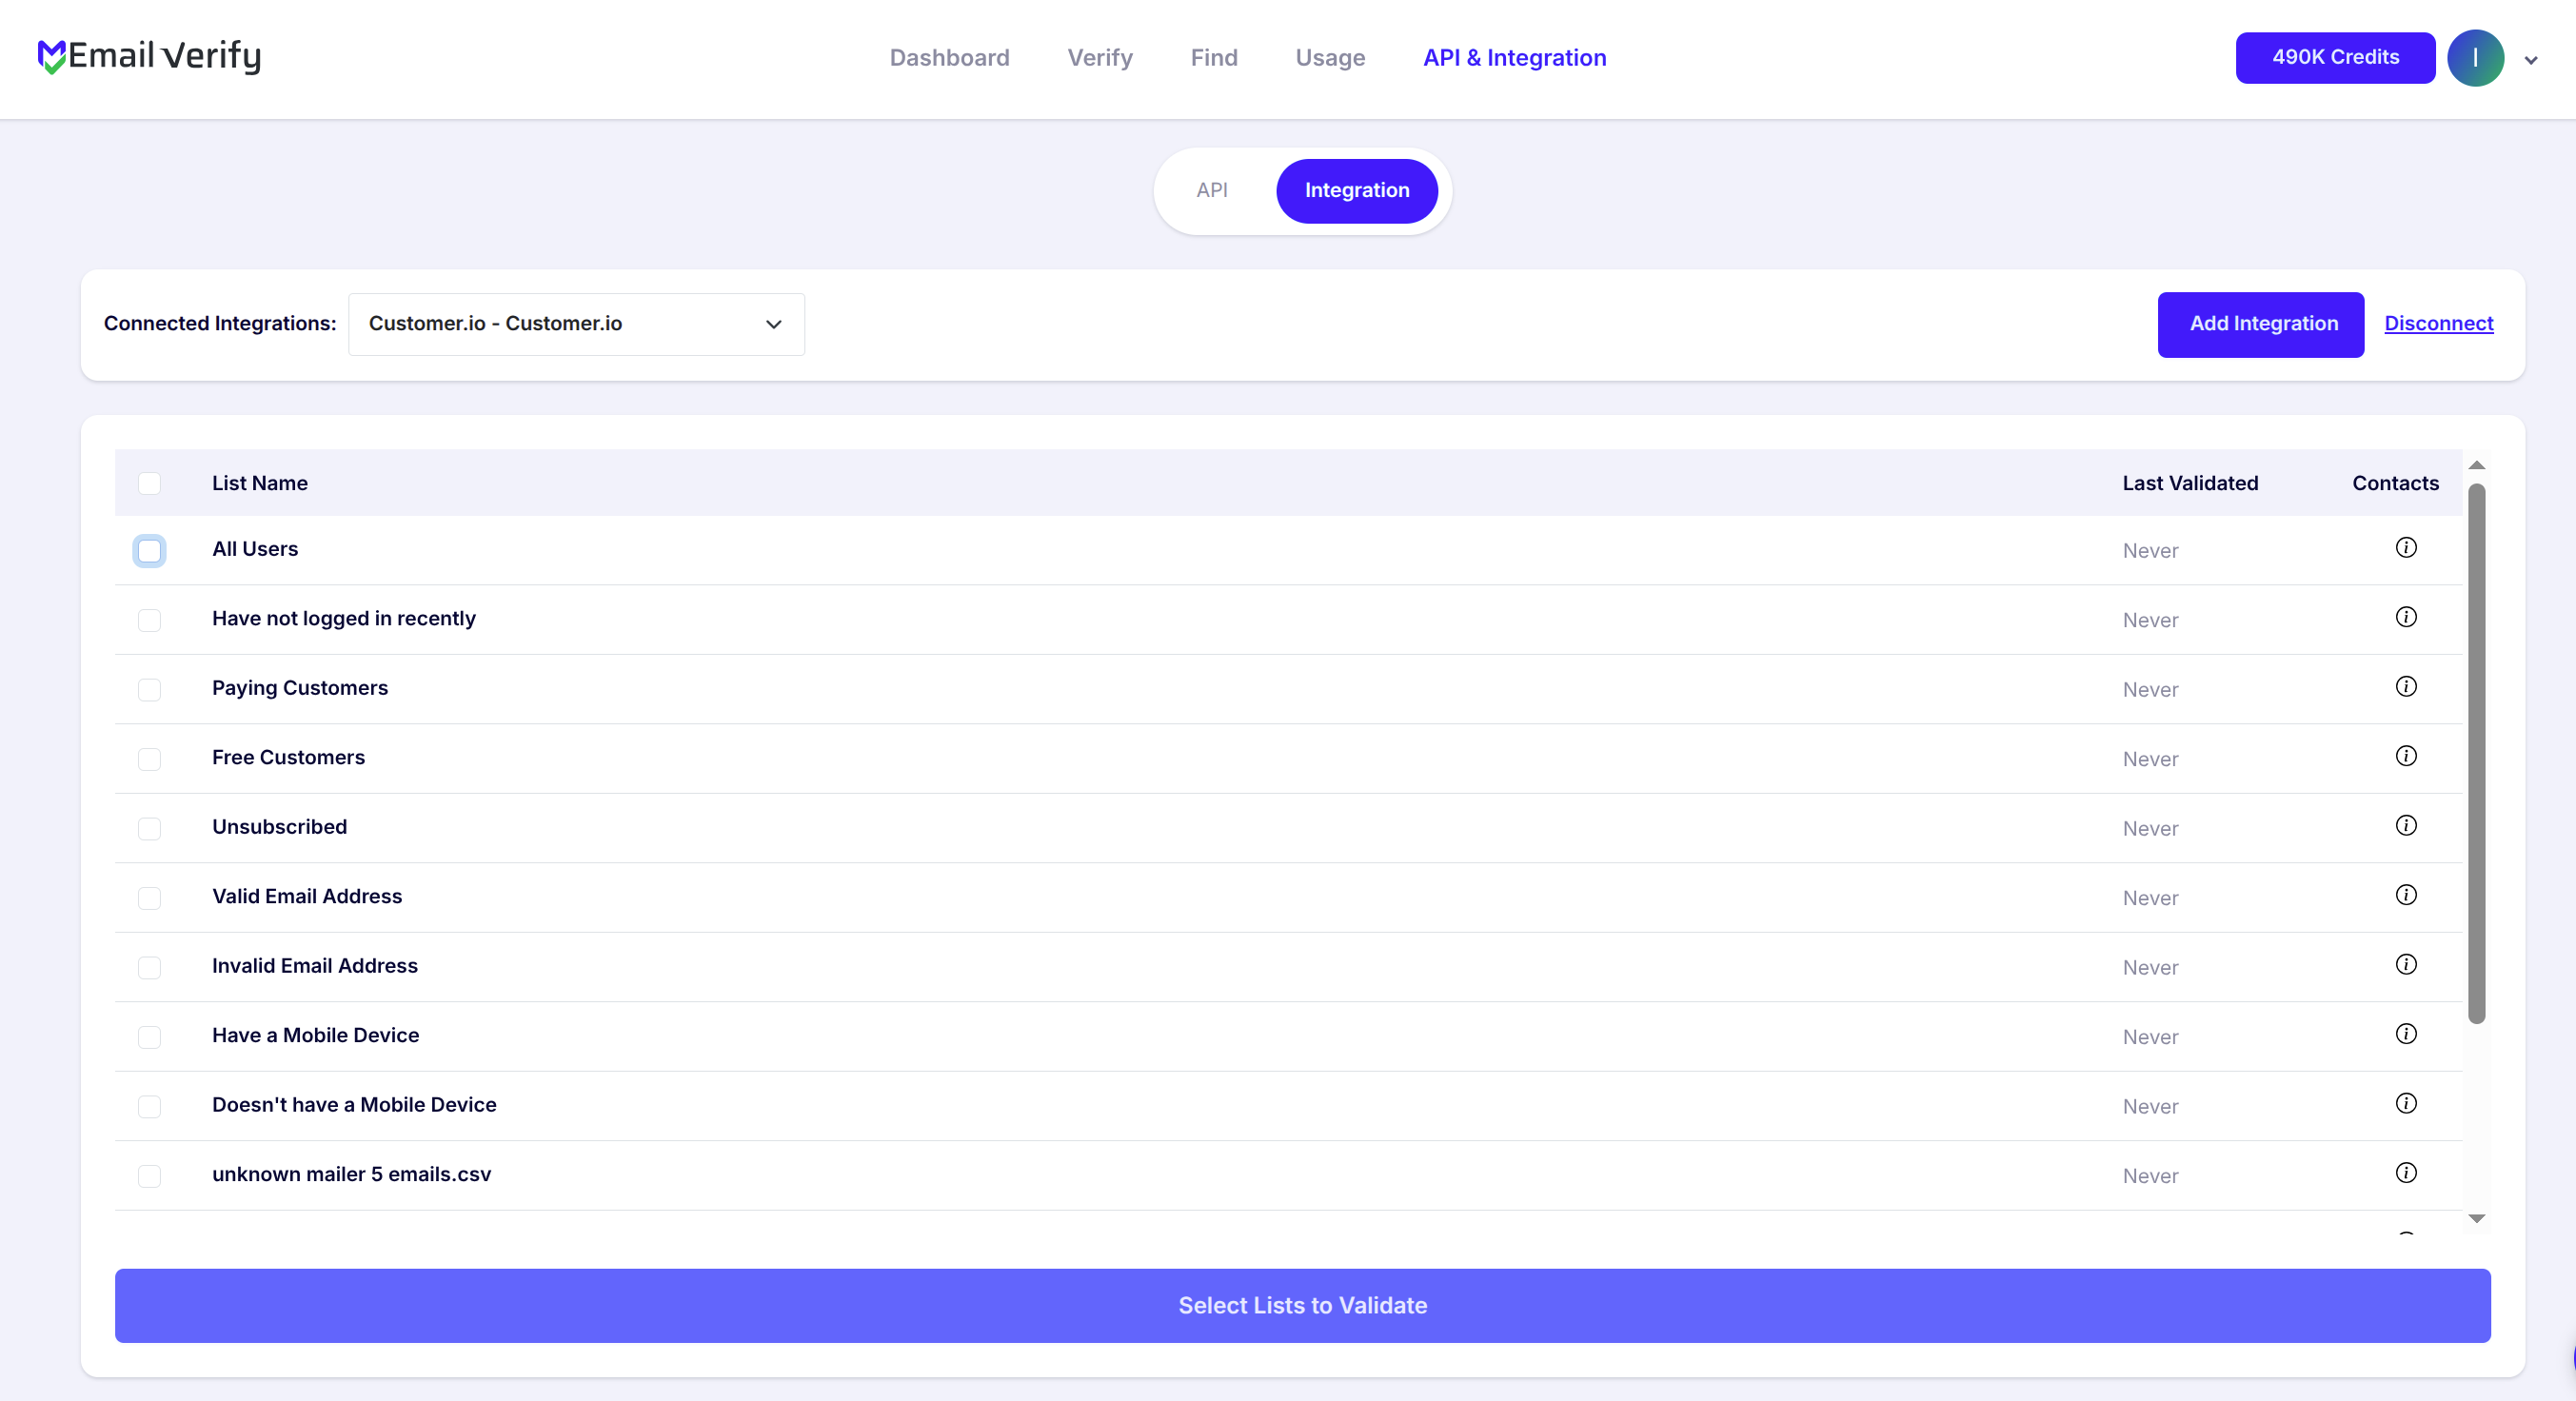
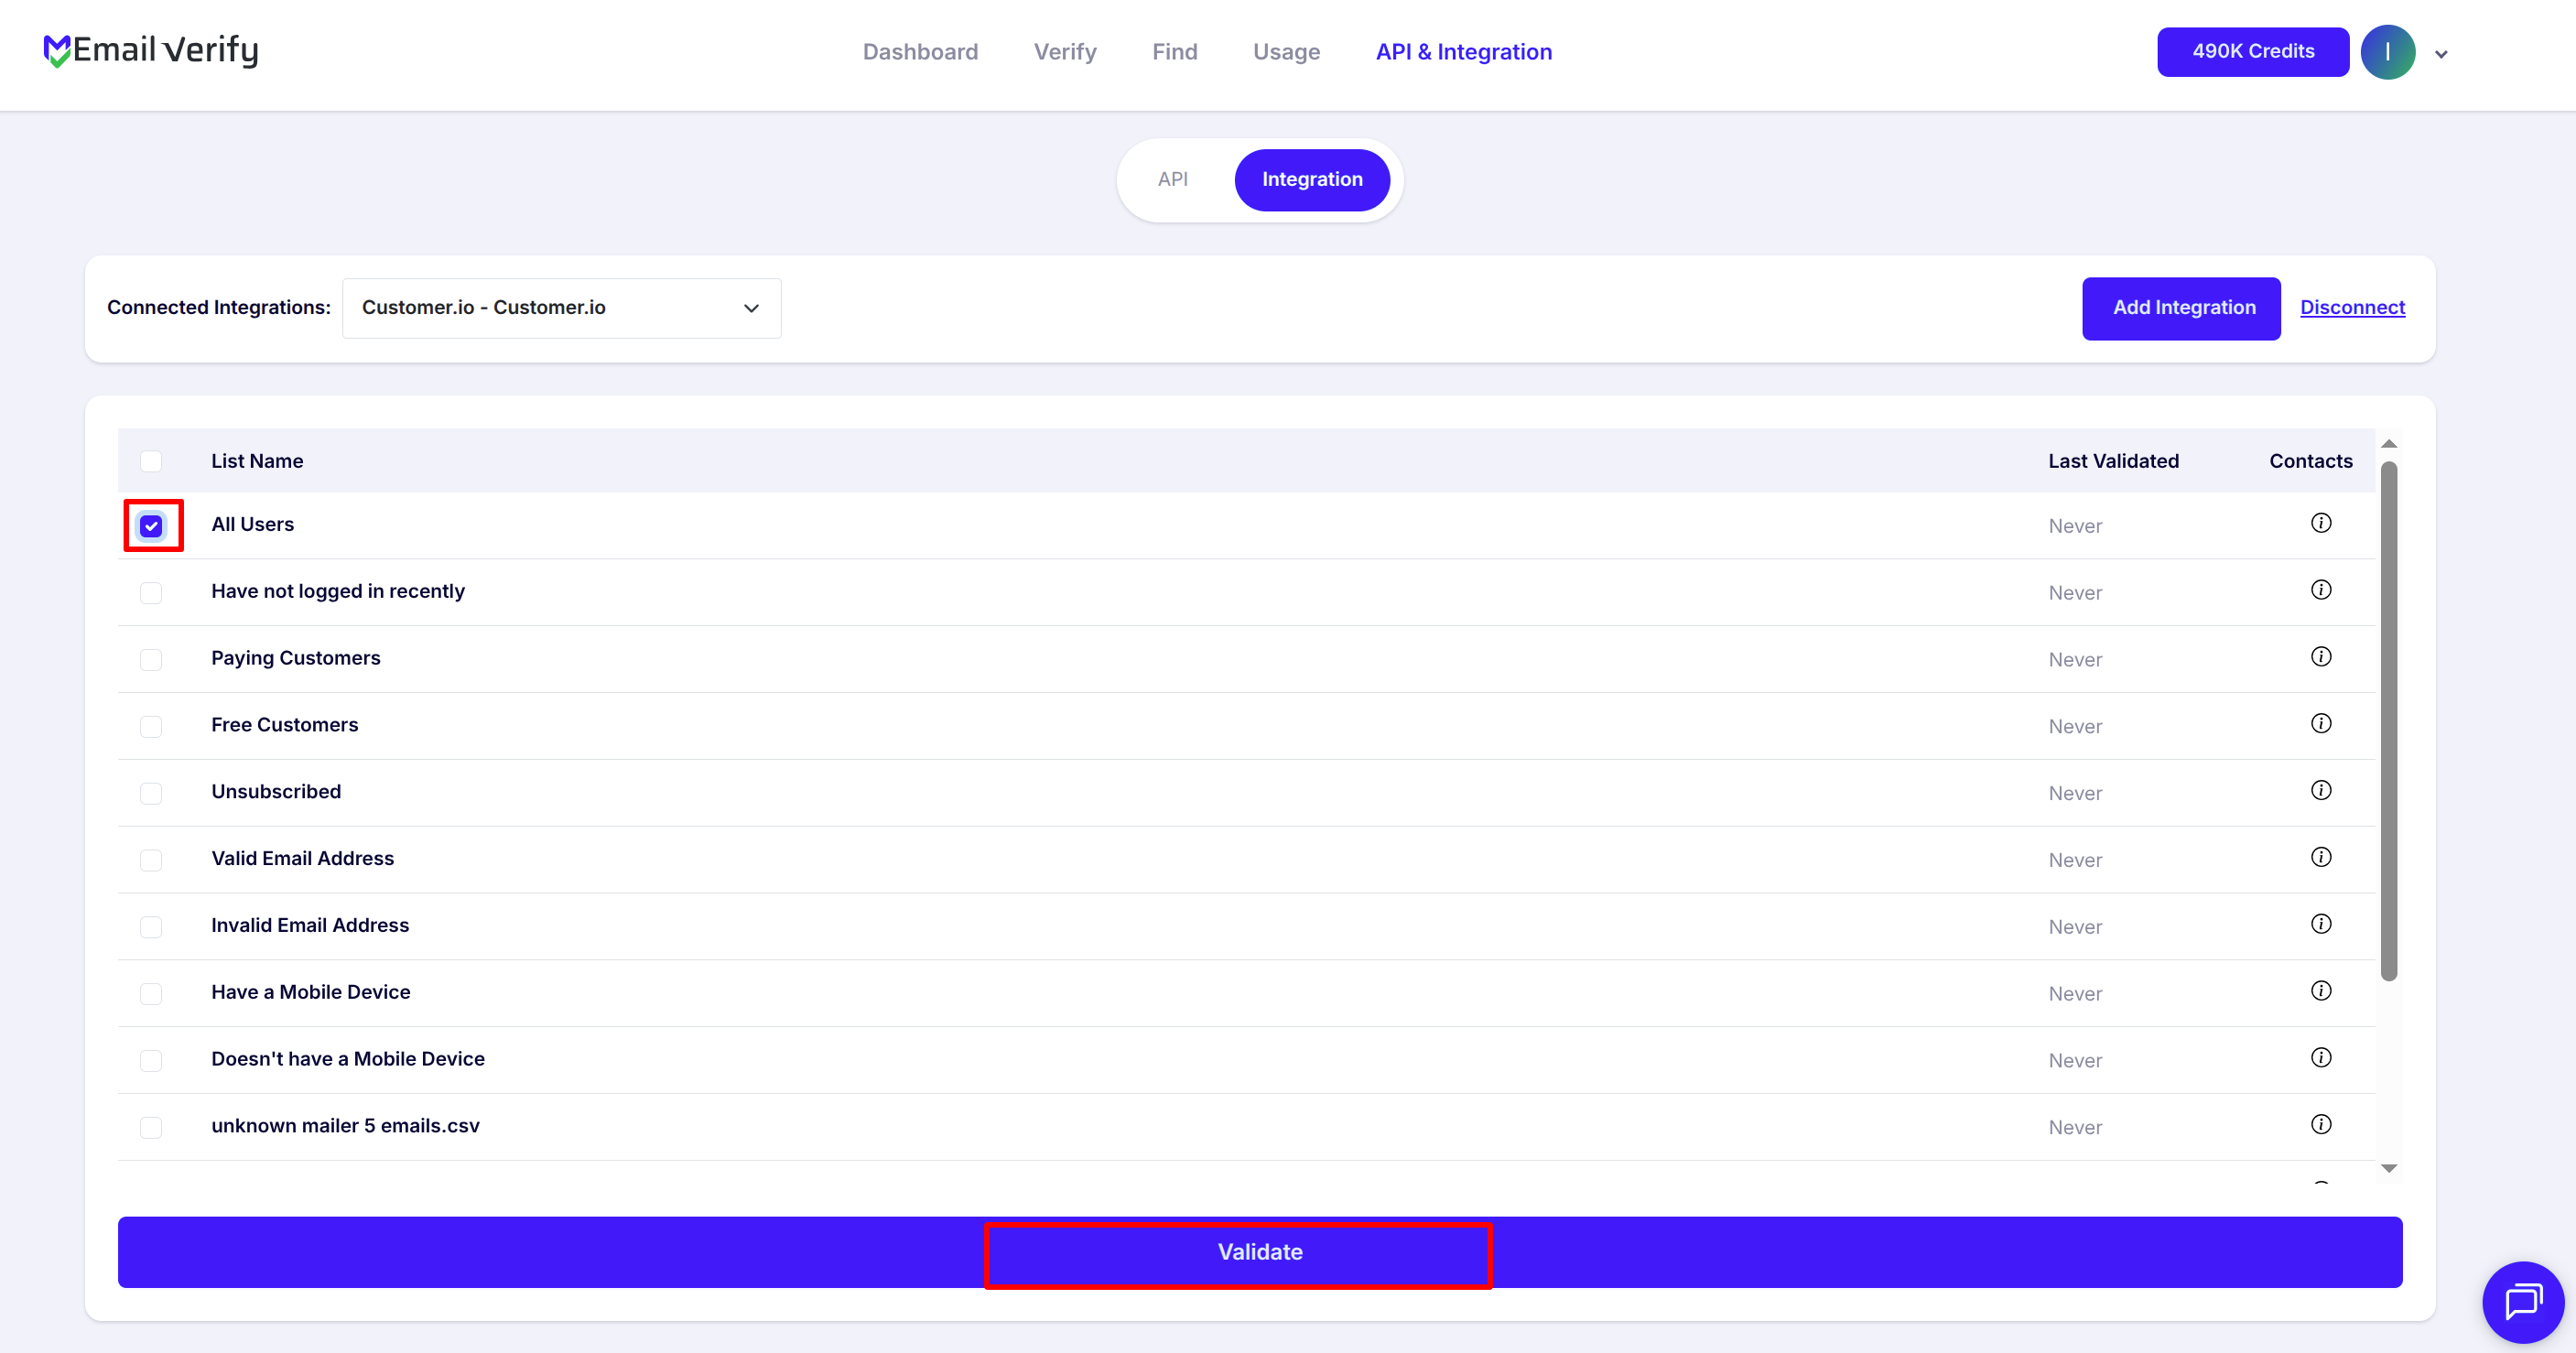
Step 10: Select Lists to Verify
Select the checkboxes next to the lists you want to verify, then click the Validate button to initiate the process.
Note: Validation results are automatically exported back to the integration from which the lists originated.
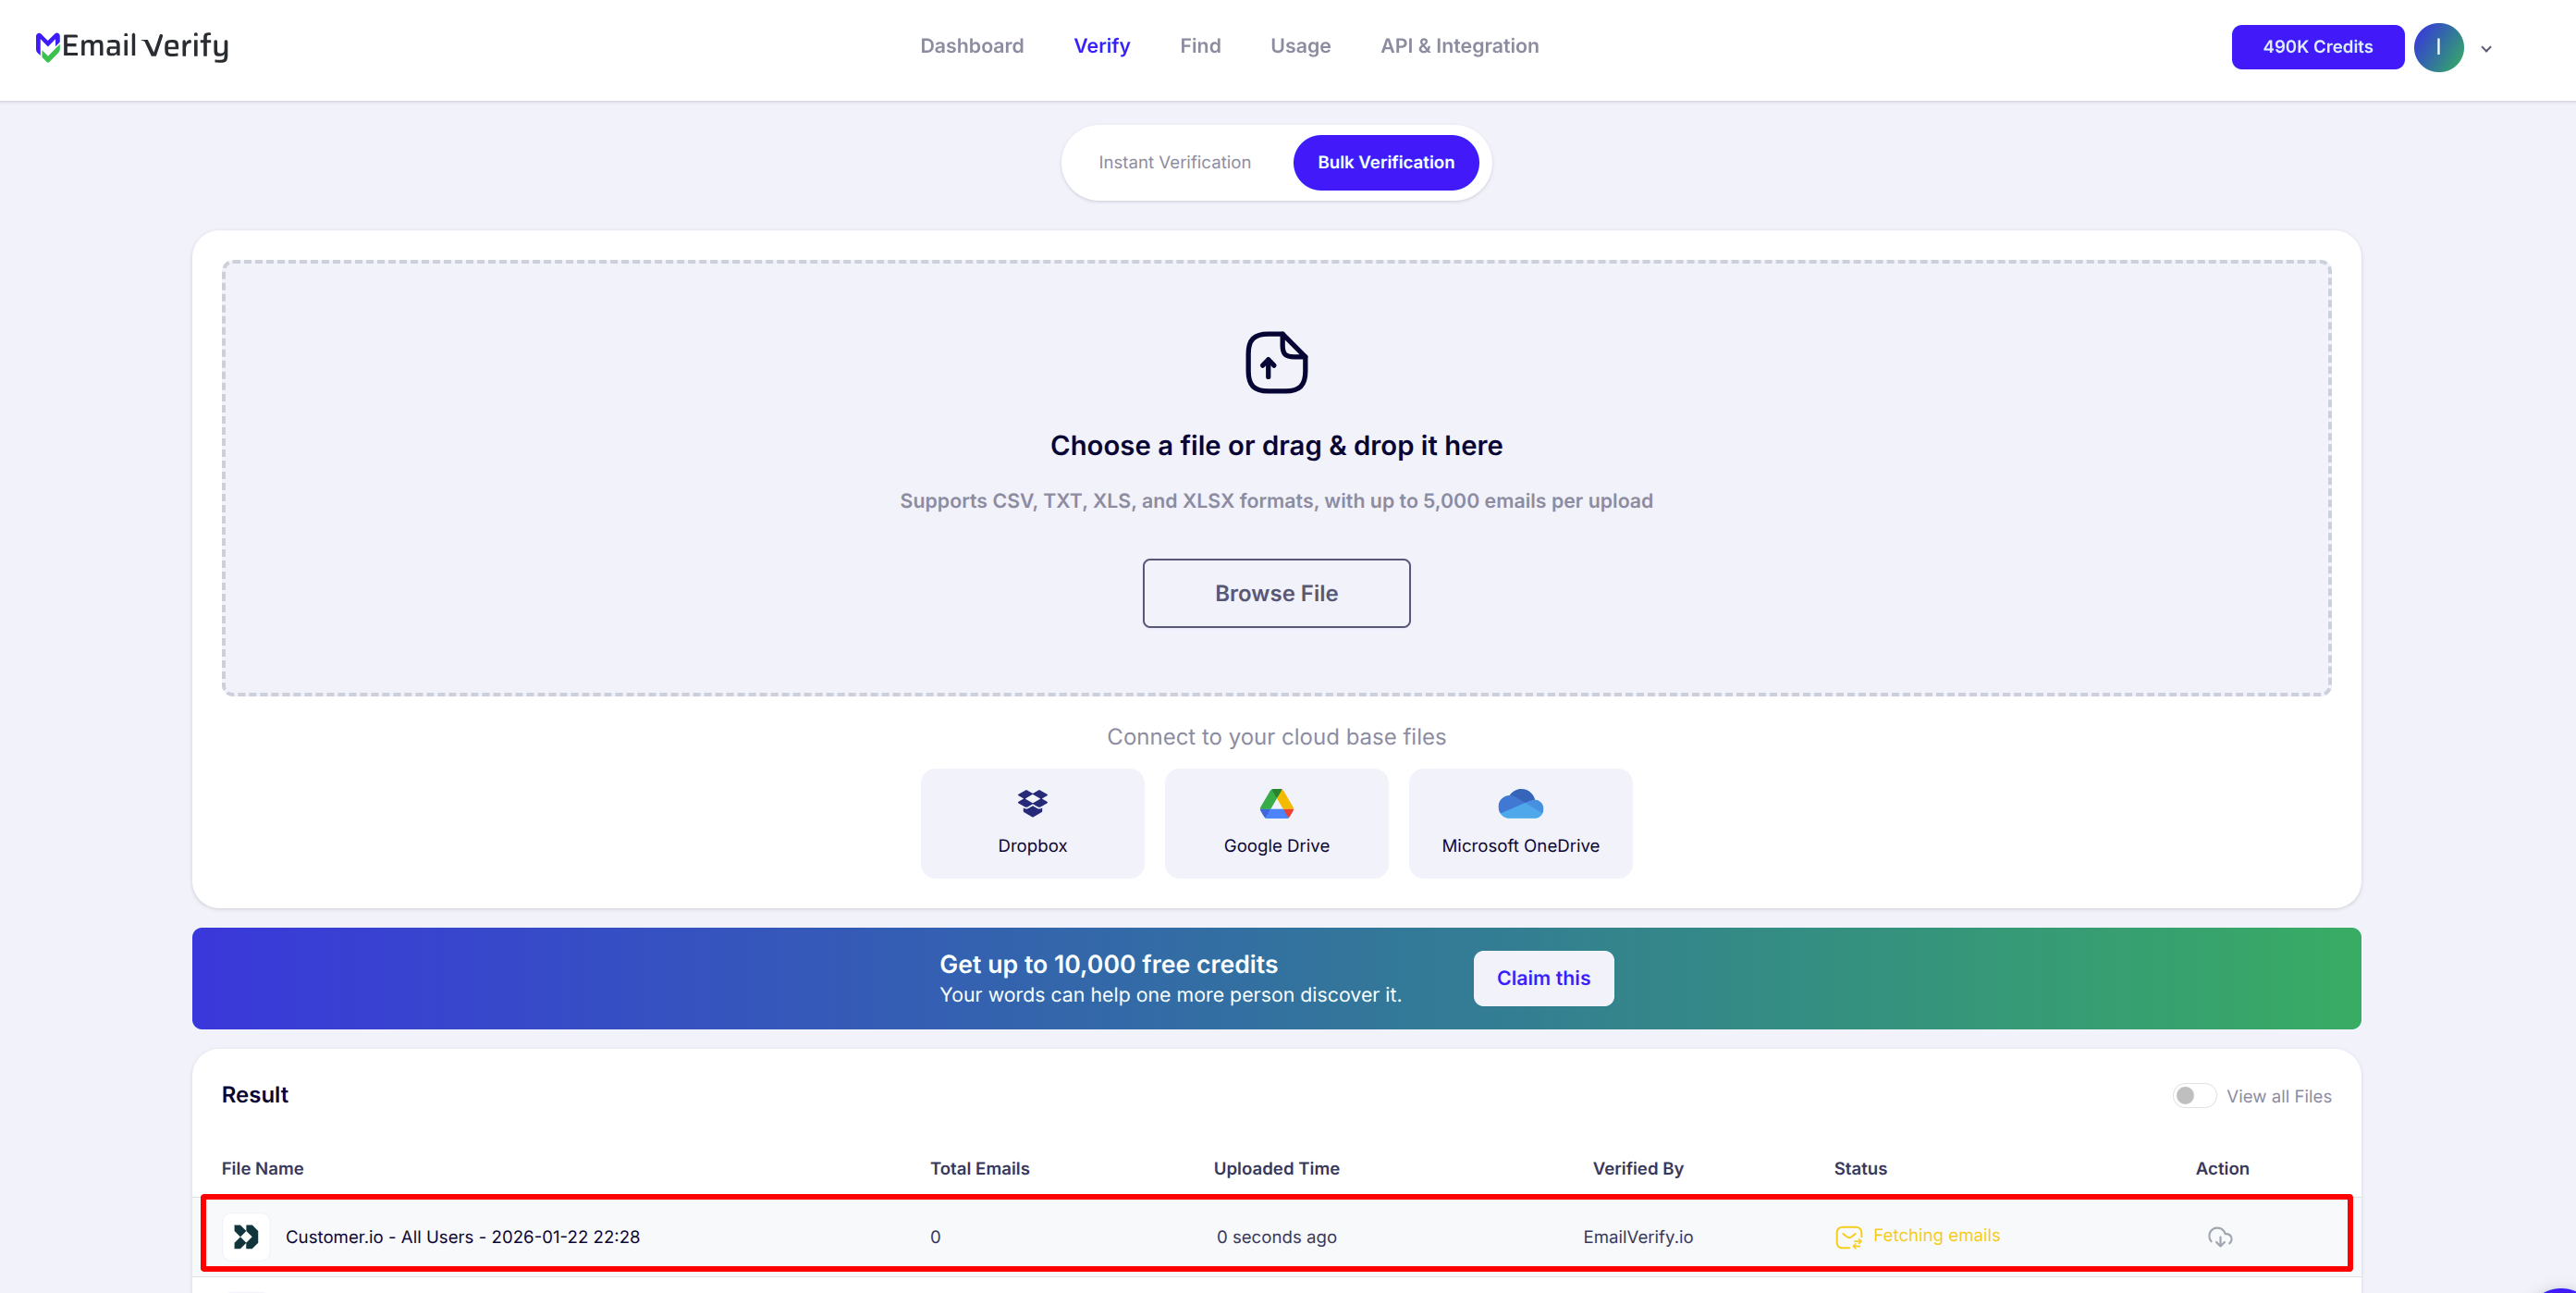
Step 11: Monitor Progress
You will be redirected to the Bulk Verification page, where you can monitor the processing status of the selected lists in real time.
Step 12: Download Results
Once processing is complete, you will receive an email notification, and the download button will become available.
The following custom attributes are added to each email:
- EV_Status
- EV_SubStatus
- EV_Validation_Timestamp

Troubleshooting & Tips
If you encounter any hiccups or want to make the most of your integration, keep these tips in mind:
- Double-check your Workspace URL, App API Key, and Pipeline API key for accuracy.
- Confirm your EmailVerify.io account has enough credits before verifying large lists.
- Refresh or reconnect the integration if your Customer.io lists don’t appear.
- Allow extra time for processing larger lists and monitor progress on the Bulk Verification page.
- Use EV_Status and sub-statuses to manage and segment your contacts effectively.
Next Steps
Turn Your Customer.io Data into Actionable Results!
Sync verified email statuses with EmailVerify.io and maintain high-quality contact lists.