Integration with Dotdigital
The EmailVerify.io integration with Dotdigital lets you verify your email contacts before sending campaigns, helping you maintain clean, reliable lists. Import your Dotdigital contacts, validate addresses in real time, and automatically sync results back.
This ensures your campaigns reach real subscribers, reduce bounce rates, and keep your Dotdigital contact data actionable and ready for better engagement.
Prerequisites
Make sure you have the following before starting:
- An active Dotdigital account
- An EmailVerify.io account with available credits
- Access to your Dotdigital API user credentials (email & password)
Step-by-Step Integration Setup
Use these steps to authorize a secure connection between Dotdigital and EmailVerify.io.
Step 1: Sign in to EmailVerify.io
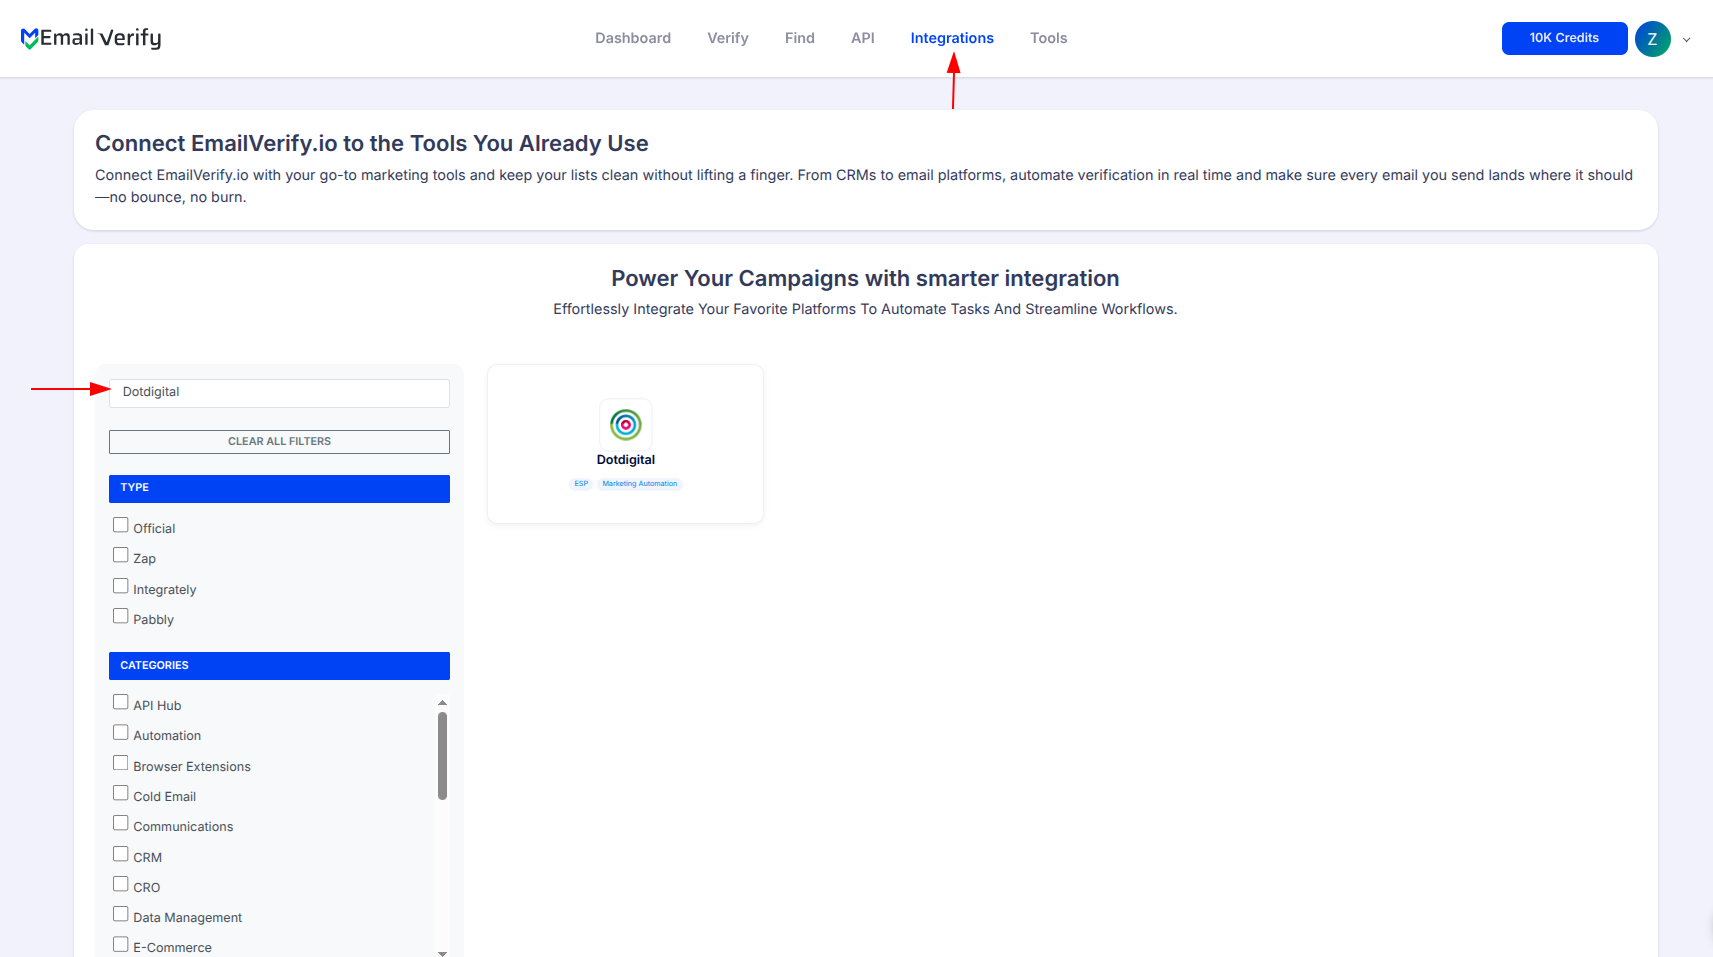
Sign in to your EmailVerify.io account and open the Integrations section from the dashboard. Use the search bar to locate Dotdigital in the list of available integrations.
Step 2: Select Dotdigital
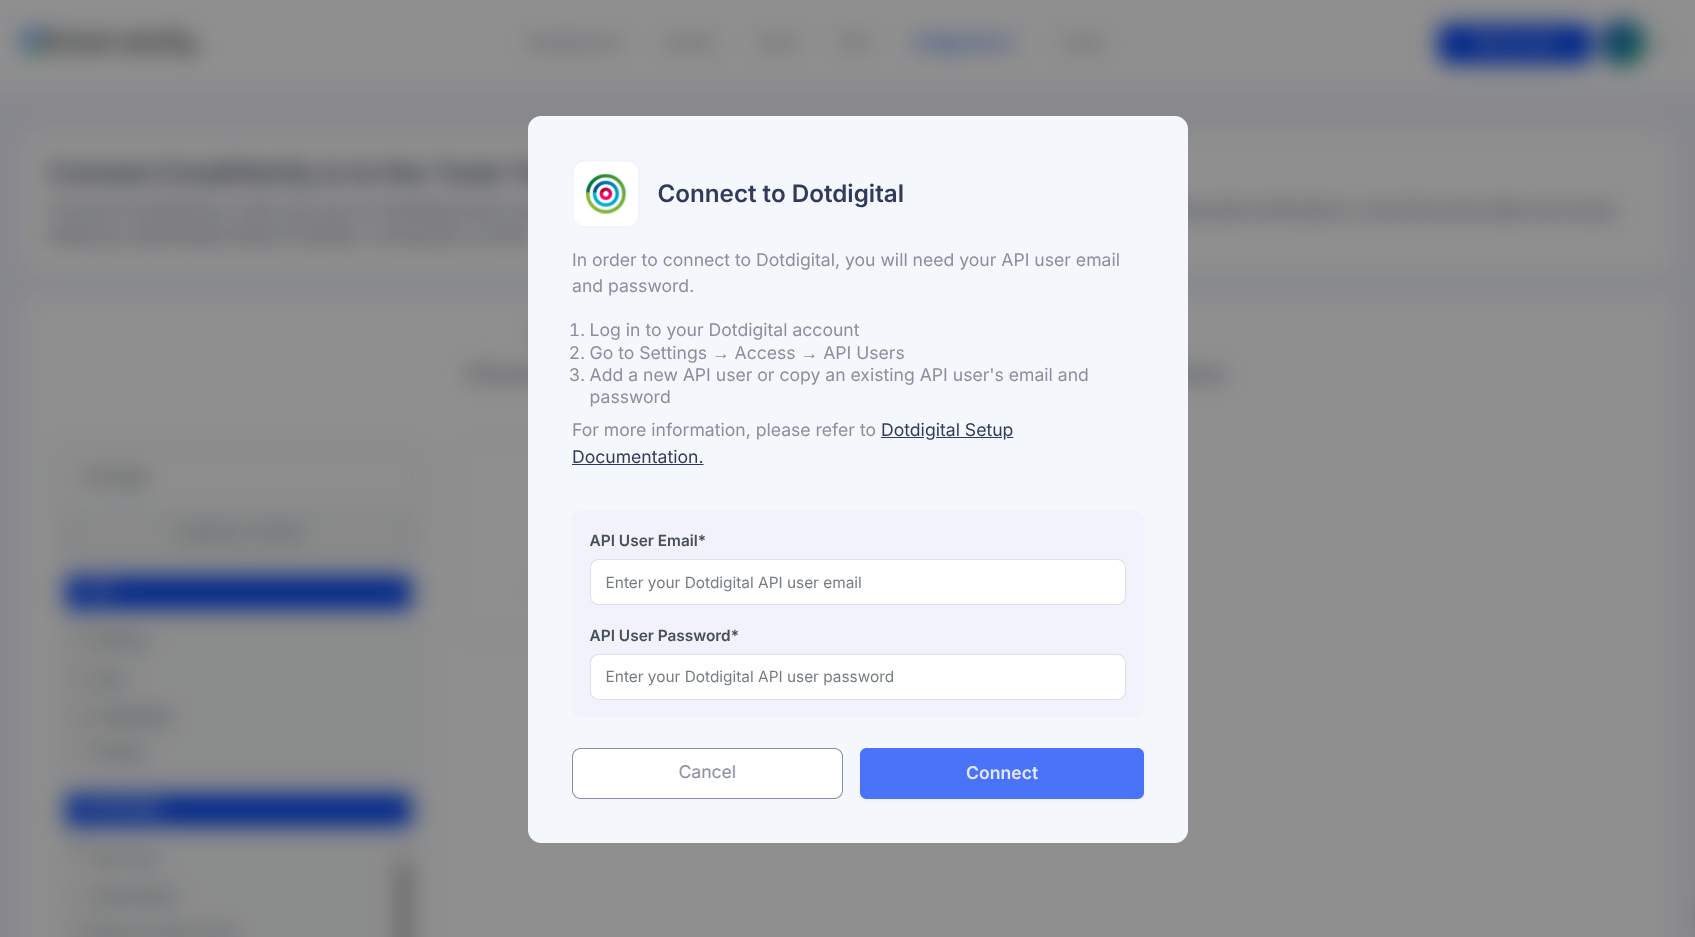
From the integrations list, select Dotdigital. You will be asked to enter your Dotdigital API user email and password to securely connect your account.
Note: We do not store your primary Dotdigital login credentials. You can use your dedicated Dotdigital API user credentials to establish a secure connection.
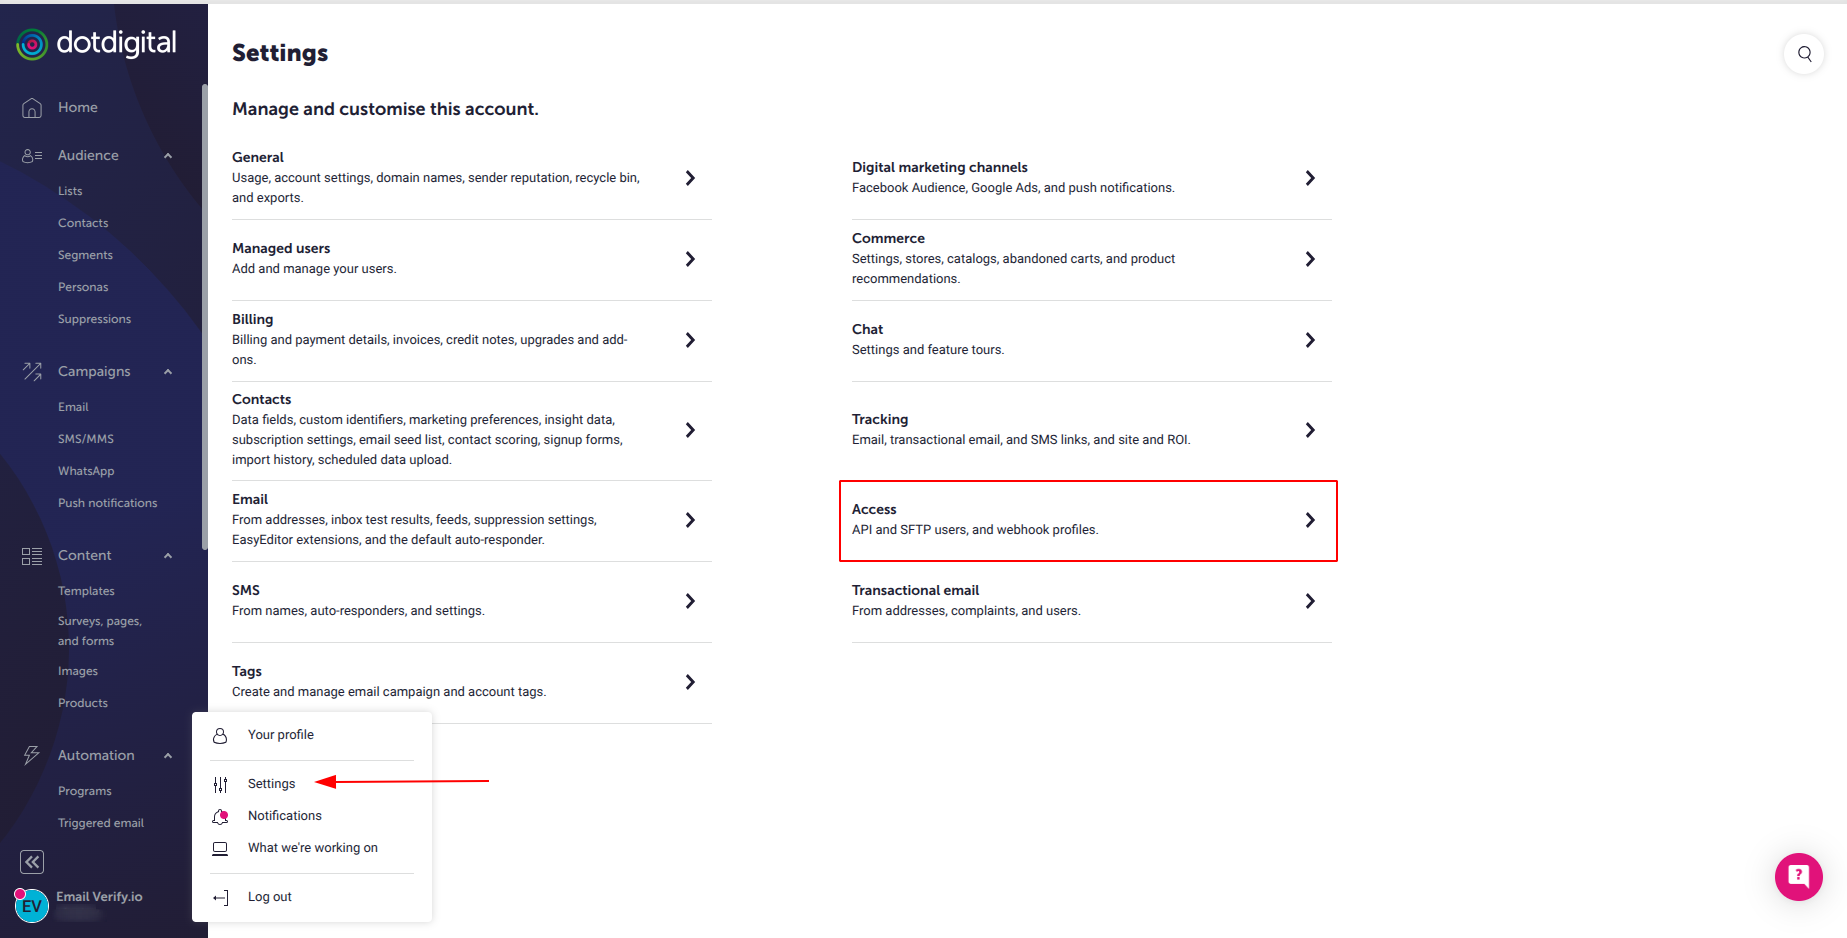
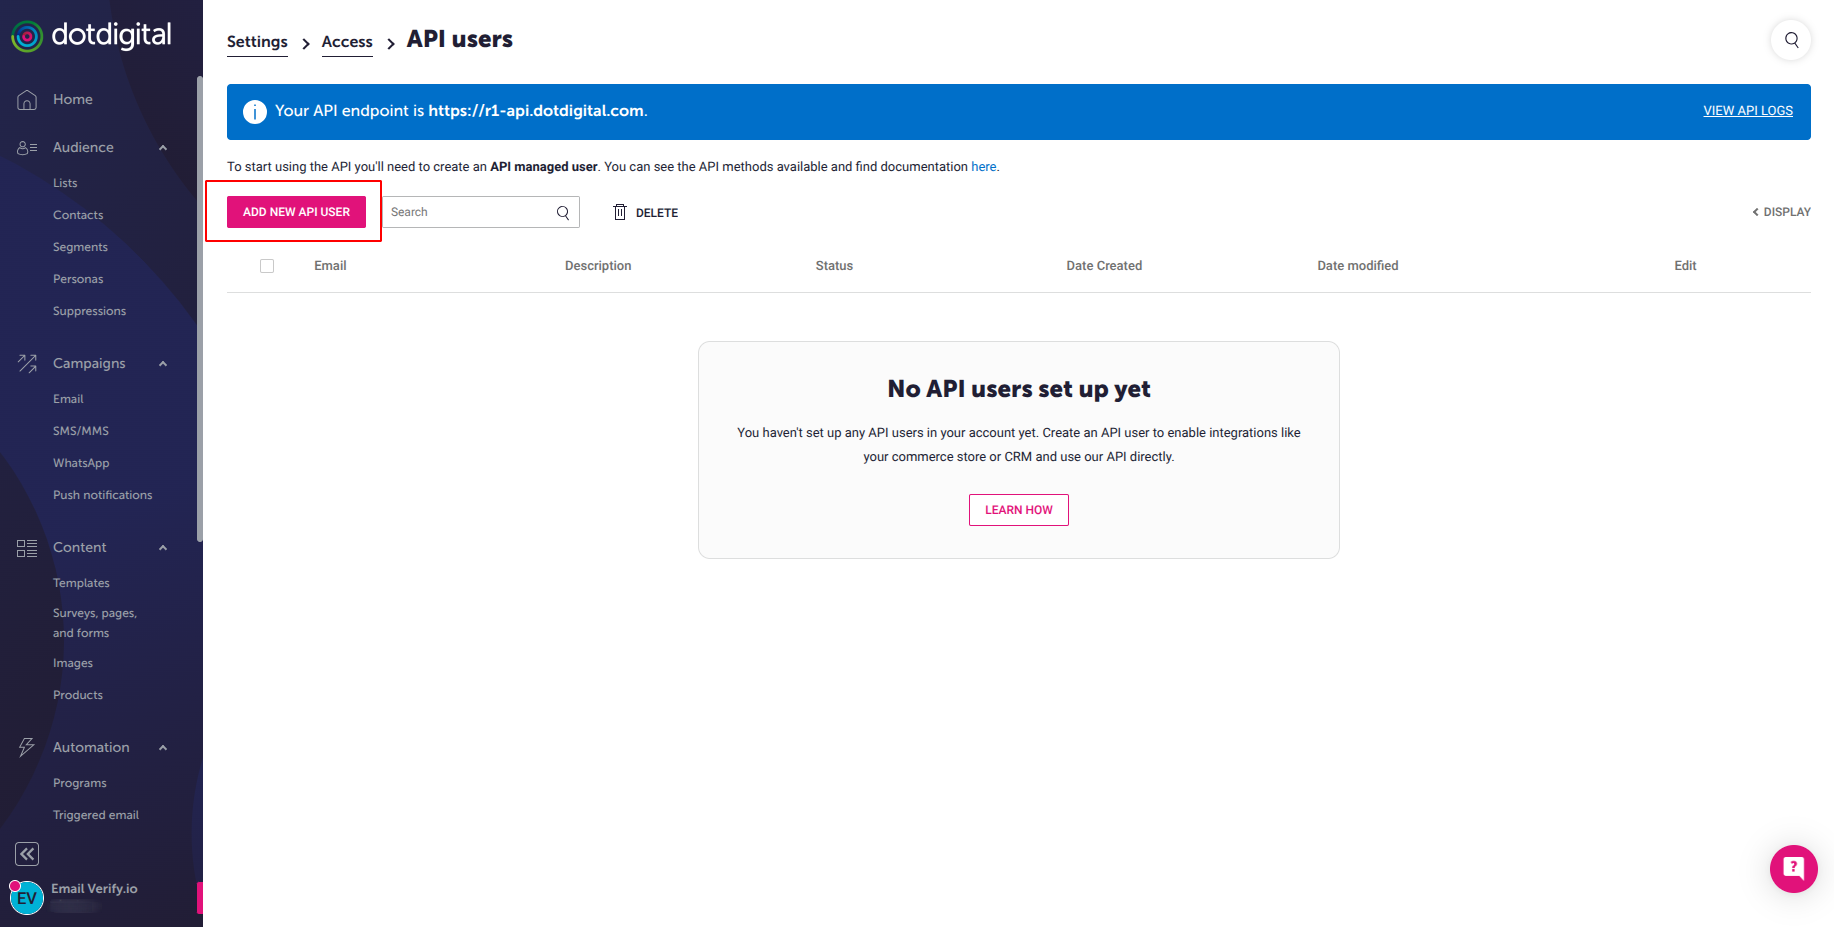
Step 3: Access API Settings in Dotdigital
Sign in to your Dotdigital account and navigate to Settings → Access. From here, you can locate or create the API user credentials required for the integration.
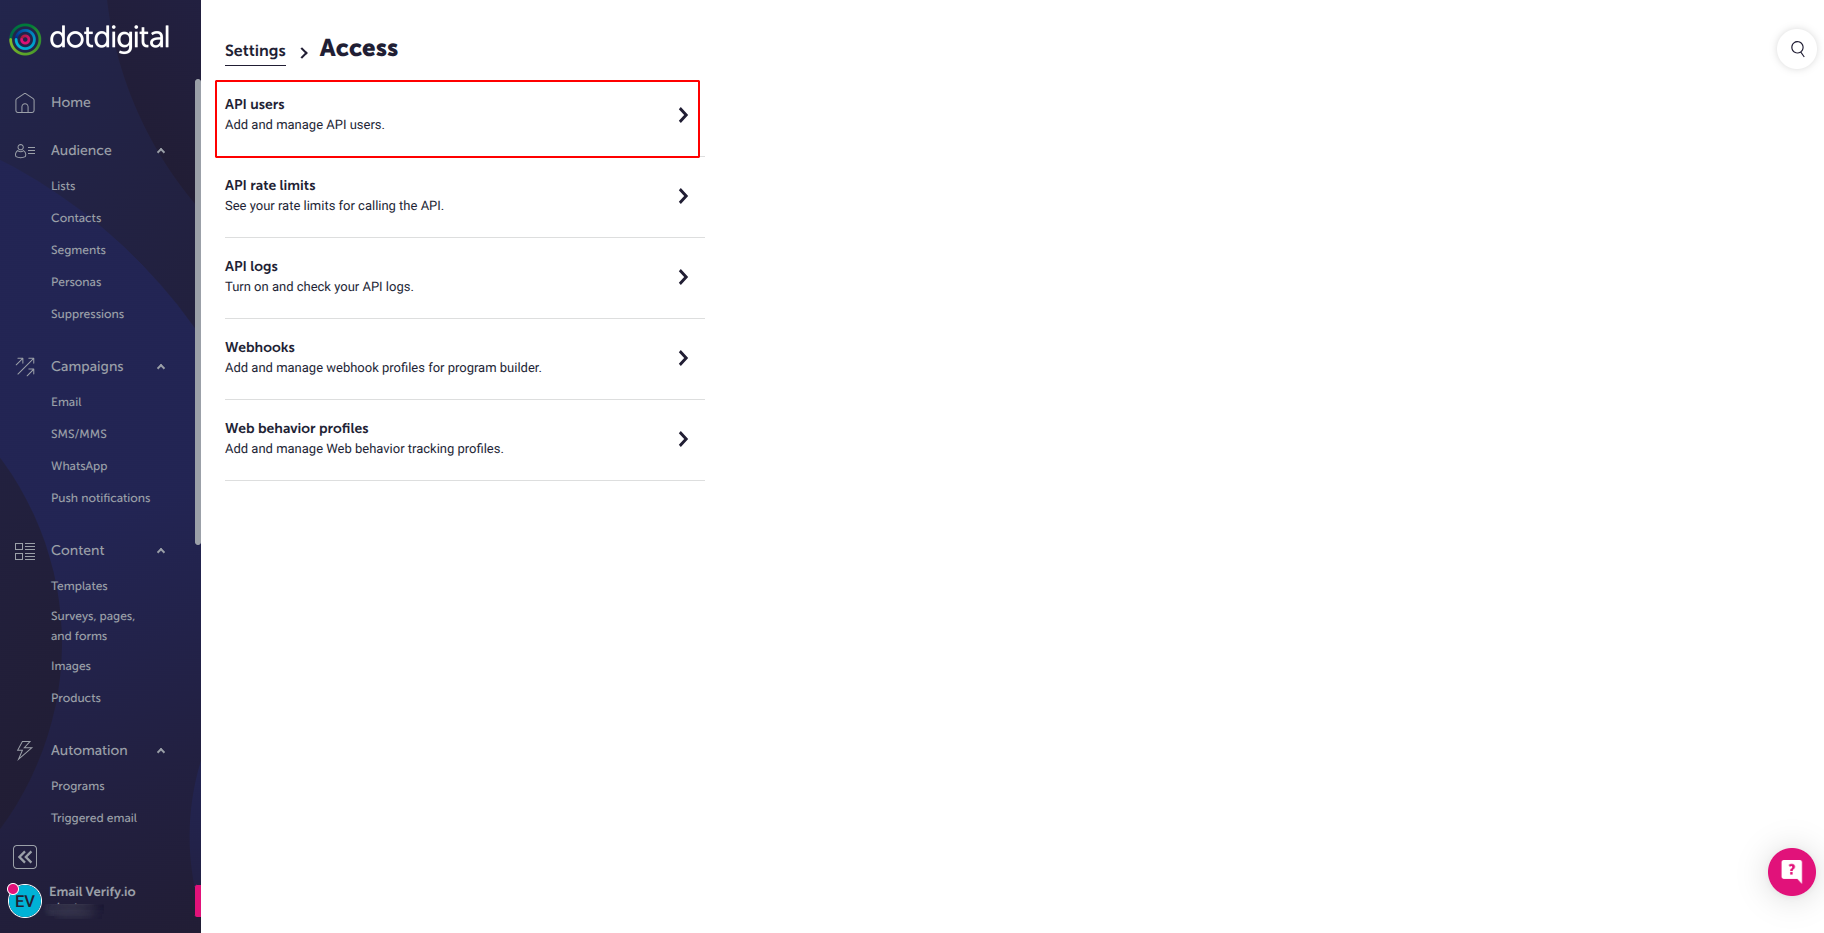
Step 4: Create a New API User
Inside the Access section, click API Users to create or manage API user accounts. This is where you will generate the credentials needed for the integration.
Step 5: Create New API User
Click Create New API User to generate a dedicated API user account. Dotdigital will create an API user email and password, which you will use to connect your account to EmailVerify.io.
Return to EmailVerify.io and enter these credentials to authorize the connection.
Step 6: View Your Lists
After the connection is authorized, EmailVerify.io will automatically retrieve your Dotdigital contact lists. These lists will appear in the Integrations page within your EmailVerify.io dashboard.
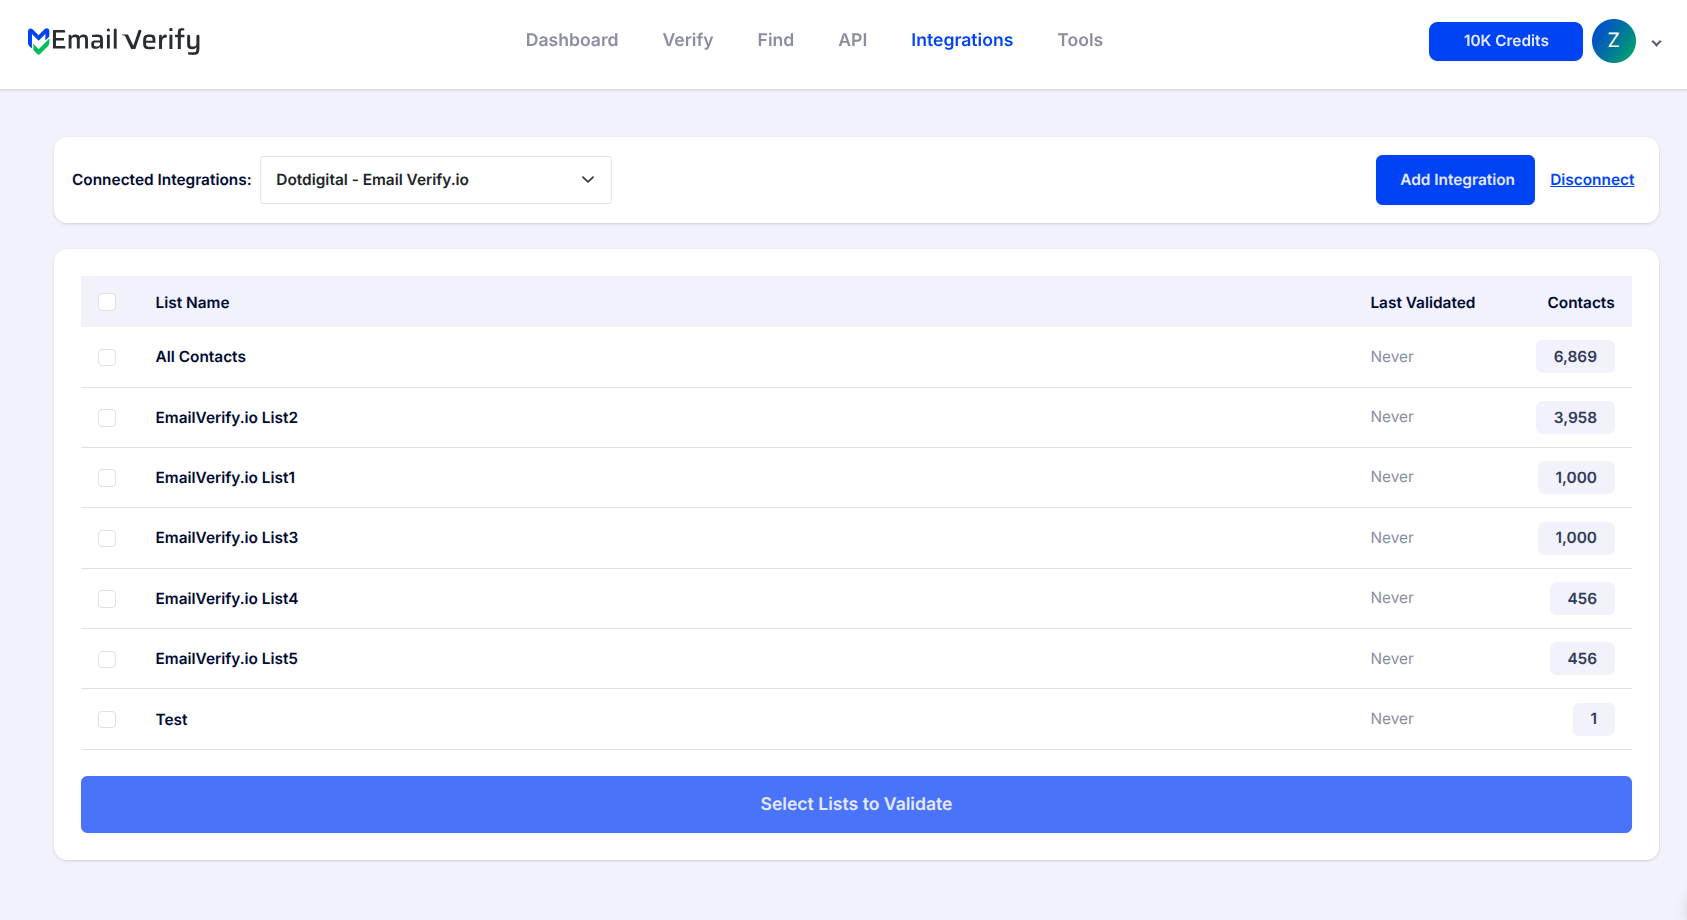
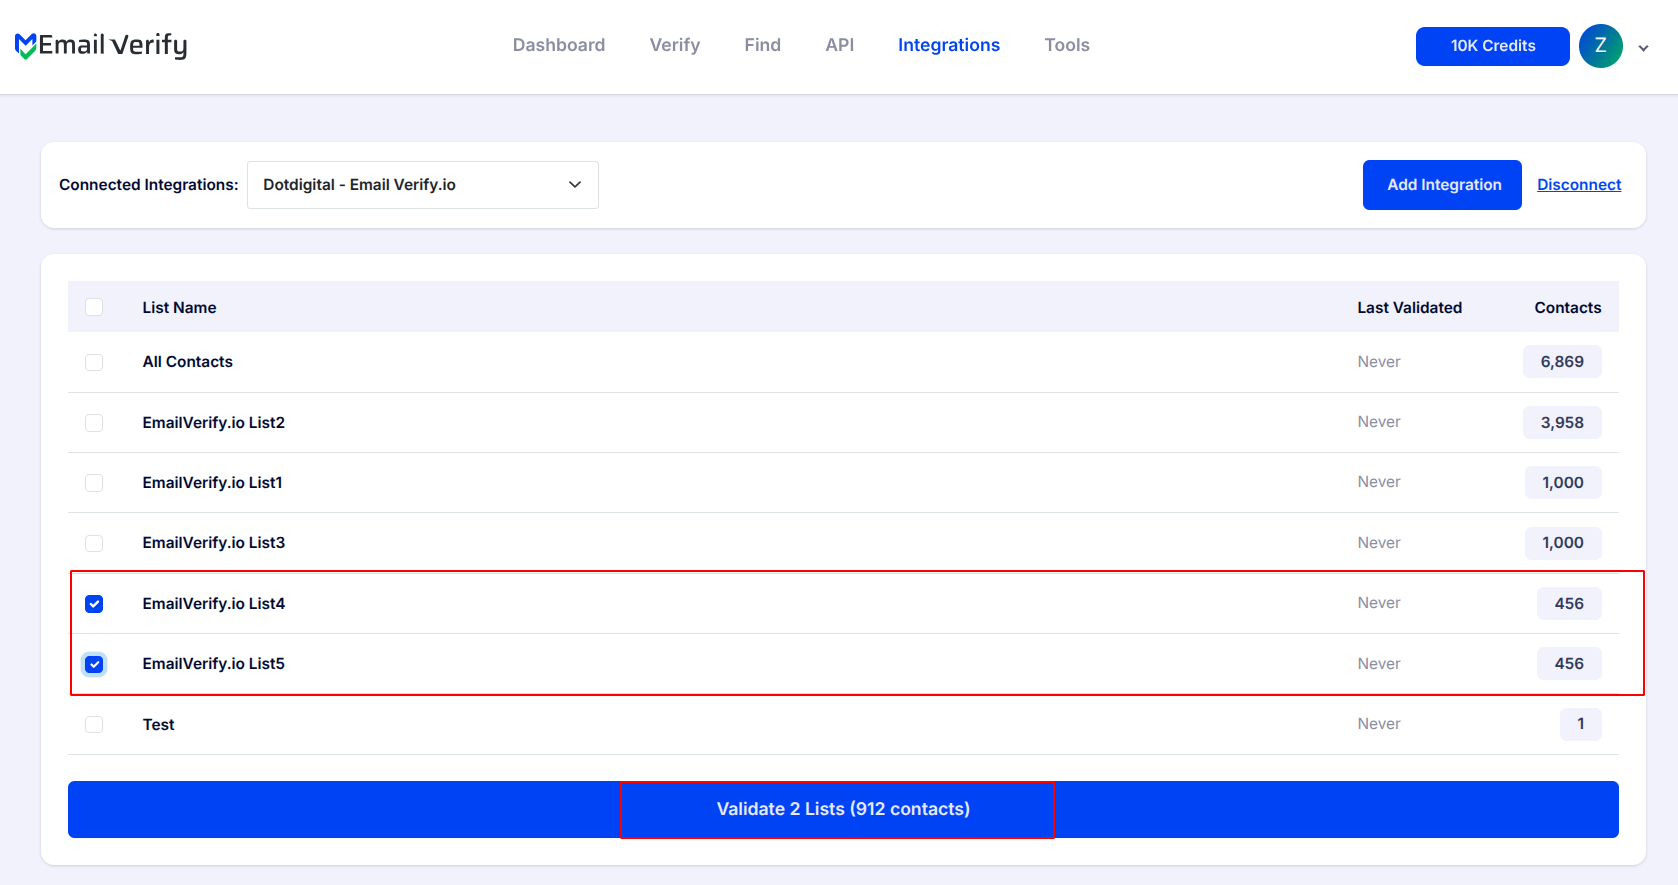
Step 7: Select Lists to Verify
Select the contact lists you want to verify by checking the corresponding boxes. Click Validate to start the verification process.
Note: Validation results are automatically exported back to the integration they originated from.
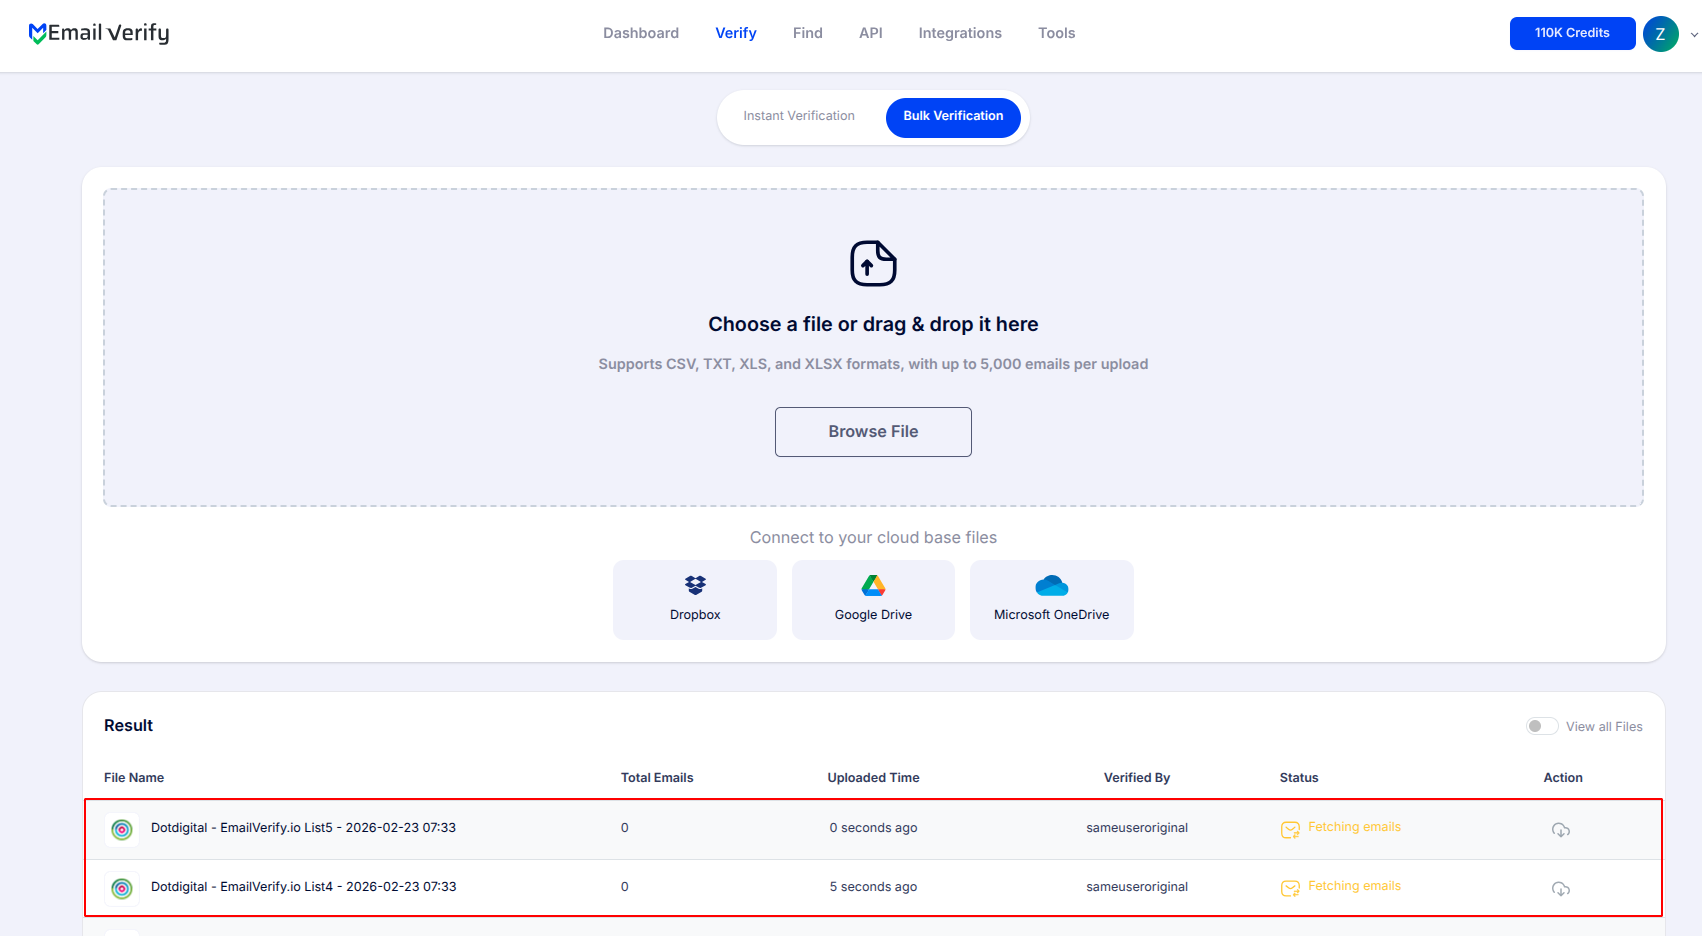
Step 8: Monitor Progress
Once verification begins, you will be redirected to the Bulk Verification page. Here, you can monitor the progress of the lists you selected while they are processed by the system.
Step 9: Download Results
When the verification process is complete:
- You will receive an email notification
- The Download button will become available on the Bulk Verification page
- You can download the verification report for your records.

Note: Each contact will include the following custom attributes:
- EV_Status
- EV_SubStatus
- EV_Validation_Time
These attributes help you maintain accurate contact data and make it easier to manage, segment, or suppress email addresses within your lists.
Troubleshooting & Tips
Once your Dotdigital integration is connected, the following tips can help ensure smooth verification and accurate results:
- Make sure you are using your Dotdigital API user email and password, not your main Dotdigital login credentials, when connecting the integration.
- If your lists do not appear after connecting, refresh the integrations page and confirm that your API user has permission to access contact lists.
- Before starting verification, ensure you have selected at least one list on the integrations page.
- For best results, verify your lists regularly to maintain clean data and improve email deliverability.
Next Steps
Make Smarter Outreach Decisions Instantly!
Verify your Dotdigital contacts with EmailVerify.io to focus on real, responsive subscribers.